Background of Arachne's Nest
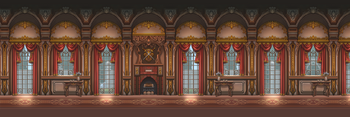
Arachne's Nest is the sixth and last dungeon in Île de Frost . Upon entering in the living room, a huge portal can be seen at the other side, and Countess Arachne is the one who is bringing forth the spiders from the portal to take possession of the manor.
Normal (Level 16-16)
1
2
3
4
5
6
7
8
9
10
11
A
[[Image:m_ {{{A1}}}.PNG]]
[[Image:m_ {{{A3}}}.PNG]]
[[Image:m_ {{{A4}}}.PNG]]
[[Image:m_ {{{A5}}}.PNG]]
[[Image:m_ {{{A6}}}.PNG]]
[[Image:m_ {{{A7}}}.PNG]]
[[Image:m_ {{{A8}}}.PNG]]
[[Image:m_ {{{A9}}}.PNG]]
[[Image:m_ {{{A10}}}.PNG]]
[[Image:m_ {{{A11}}}.PNG]]
B
[[Image:m_ {{{B1}}}.PNG]]
[[Image:m_ {{{B2}}}.PNG]]
[[Image:m_ {{{B3}}}.PNG]]
[[Image:m_ {{{B4}}}.PNG]]
[[Image:m_ {{{B5}}}.PNG]]
[[Image:m_ {{{B6}}}.PNG]]
[[Image:m_ {{{B7}}}.PNG]]
[[Image:m_ {{{B8}}}.PNG]]
[[Image:m_ {{{B9}}}.PNG]]
[[Image:m_ {{{B10}}}.PNG]]
[[Image:m_ {{{B11}}}.PNG]]
C
[[Image:m_ {{{C1}}}.PNG]]
[[Image:m_ {{{C2}}}.PNG]]
[[Image:m_ {{{C3}}}.PNG]]
[[Image:m_ {{{C4}}}.PNG]]
[[Image:m_ {{{C5}}}.PNG]]
[[Image:m_ {{{C6}}}.PNG]]
[[Image:m_ {{{C7}}}.PNG]]
[[Image:m_ {{{C8}}}.PNG]]
[[Image:m_ {{{C9}}}.PNG]]
[[Image:m_ {{{C10}}}.PNG]]
[[Image:m_ {{{C11}}}.PNG]]
D
[[Image:m_ {{{D1}}}.PNG]]
[[Image:m_ {{{D2}}}.PNG]]
[[Image:m_ {{{D3}}}.PNG]]
[[Image:m_ {{{D4}}}.PNG]]
[[Image:m_ {{{D5}}}.PNG]]
[[Image:m_ {{{D6}}}.PNG]]
[[Image:m_ {{{D7}}}.PNG]]
[[Image:m_ {{{D8}}}.PNG]]
[[Image:m_ {{{D9}}}.PNG]]
[[Image:m_ {{{D10}}}.PNG]]
[[Image:m_ {{{D11}}}.PNG]]
E
[[Image:m_ {{{E1}}}.PNG]]
[[Image:m_ {{{E2}}}.PNG]]
[[Image:m_ {{{E3}}}.PNG]]
[[Image:m_ {{{E4}}}.PNG]]
[[Image:m_ {{{E5}}}.PNG]]
[[Image:m_ {{{E6}}}.PNG]]
[[Image:m_ {{{E7}}}.PNG]]
[[Image:m_ {{{E8}}}.PNG]]
[[Image:m_ {{{E9}}}.PNG]]
[[Image:m_ {{{E10}}}.PNG]]
[[Image:m_ {{{E11}}}.PNG]]
F
[[Image:m_ {{{F1}}}.PNG]]
[[Image:m_ {{{F2}}}.PNG]]
[[Image:m_ {{{F3}}}.PNG]]
[[Image:m_ {{{F4}}}.PNG]]
[[Image:m_ {{{F5}}}.PNG]]
[[Image:m_ {{{F6}}}.PNG]]
[[Image:m_ {{{F7}}}.PNG]]
[[Image:m_ {{{F8}}}.PNG]]
[[Image:m_ {{{F9}}}.PNG]]
[[Image:m_ {{{F10}}}.PNG]]
[[Image:m_ {{{F11}}}.PNG]]
G
[[Image:m_ {{{G1}}}.PNG]]
[[Image:m_ {{{G2}}}.PNG]]
[[Image:m_ {{{G3}}}.PNG]]
[[Image:m_ {{{G4}}}.PNG]]
[[Image:m_ {{{G5}}}.PNG]]
[[Image:m_ {{{G6}}}.PNG]]
[[Image:m_ {{{G7}}}.PNG]]
[[Image:m_ {{{G8}}}.PNG]]
[[Image:m_ {{{G9}}}.PNG]]
[[Image:m_ {{{G10}}}.PNG]]
[[Image:m_ {{{G11}}}.PNG]]
H
[[Image:m_ {{{H1}}}.PNG]]
[[Image:m_ {{{H2}}}.PNG]]
[[Image:m_ {{{H3}}}.PNG]]
[[Image:m_ {{{H4}}}.PNG]]
[[Image:m_ {{{H5}}}.PNG]]
[[Image:m_ {{{H6}}}.PNG]]
[[Image:m_ {{{H7}}}.PNG]]
[[Image:m_ {{{H8}}}.PNG]]
[[Image:m_ {{{H9}}}.PNG]]
[[Image:m_ {{{H10}}}.PNG]]
[[Image:m_ {{{H11}}}.PNG]]
I
[[Image:m_ {{{I1}}}.PNG]]
[[Image:m_ {{{I2}}}.PNG]]
[[Image:m_ {{{I3}}}.PNG]]
[[Image:m_ {{{I4}}}.PNG]]
[[Image:m_ {{{I5}}}.PNG]]
[[Image:m_ {{{I6}}}.PNG]]
[[Image:m_ {{{I7}}}.PNG]]
[[Image:m_ {{{I8}}}.PNG]]
[[Image:m_ {{{I9}}}.PNG]]
[[Image:m_ {{{I10}}}.PNG]]
[[Image:m_ {{{I11}}}.PNG]]
I
[[Image:m_ {{{J1}}}.PNG]]
[[Image:m_ {{{J2}}}.PNG]]
[[Image:m_ {{{J3}}}.PNG]]
[[Image:m_ {{{J4}}}.PNG]]
[[Image:m_ {{{J5}}}.PNG]]
[[Image:m_ {{{J6}}}.PNG]]
[[Image:m_ {{{J7}}}.PNG]]
[[Image:m_ {{{J8}}}.PNG]]
[[Image:m_ {{{J9}}}.PNG]]
[[Image:m_ {{{J10}}}.PNG]]
[[Image:m_ {{{J11}}}.PNG]]
I
[[Image:m_ {{{K1}}}.PNG]]
[[Image:m_ {{{K2}}}.PNG]]
[[Image:m_ {{{K3}}}.PNG]]
[[Image:m_ {{{K4}}}.PNG]]
[[Image:m_ {{{K5}}}.PNG]]
[[Image:m_ {{{K6}}}.PNG]]
[[Image:m_ {{{K7}}}.PNG]]
[[Image:m_ {{{K8}}}.PNG]]
[[Image:m_ {{{K9}}}.PNG]]
[[Image:m_ {{{K10}}}.PNG]]
[[Image:m_ {{{K11}}}.PNG]]
Hard (Level 17-17)
1
2
3
4
5
6
7
8
9
10
11
A
[[Image:m_ {{{A1}}}.PNG]]
[[Image:m_ {{{A5}}}.PNG]]
[[Image:m_ {{{A6}}}.PNG]]
[[Image:m_ {{{A7}}}.PNG]]
[[Image:m_ {{{A8}}}.PNG]]
[[Image:m_ {{{A9}}}.PNG]]
[[Image:m_ {{{A10}}}.PNG]]
[[Image:m_ {{{A11}}}.PNG]]
B
[[Image:m_ {{{B1}}}.PNG]]
[[Image:m_ {{{B2}}}.PNG]]
[[Image:m_ {{{B3}}}.PNG]]
[[Image:m_ {{{B4}}}.PNG]]
[[Image:m_ {{{B5}}}.PNG]]
[[Image:m_ {{{B6}}}.PNG]]
[[Image:m_ {{{B7}}}.PNG]]
[[Image:m_ {{{B8}}}.PNG]]
[[Image:m_ {{{B9}}}.PNG]]
[[Image:m_ {{{B10}}}.PNG]]
[[Image:m_ {{{B11}}}.PNG]]
C
[[Image:m_ {{{C1}}}.PNG]]
[[Image:m_ {{{C2}}}.PNG]]
[[Image:m_ {{{C3}}}.PNG]]
[[Image:m_ {{{C4}}}.PNG]]
[[Image:m_ {{{C5}}}.PNG]]
[[Image:m_ {{{C6}}}.PNG]]
[[Image:m_ {{{C7}}}.PNG]]
[[Image:m_ {{{C8}}}.PNG]]
[[Image:m_ {{{C9}}}.PNG]]
[[Image:m_ {{{C10}}}.PNG]]
[[Image:m_ {{{C11}}}.PNG]]
D
[[Image:m_ {{{D1}}}.PNG]]
[[Image:m_ {{{D2}}}.PNG]]
[[Image:m_ {{{D3}}}.PNG]]
[[Image:m_ {{{D4}}}.PNG]]
[[Image:m_ {{{D5}}}.PNG]]
[[Image:m_ {{{D6}}}.PNG]]
[[Image:m_ {{{D7}}}.PNG]]
[[Image:m_ {{{D8}}}.PNG]]
[[Image:m_ {{{D9}}}.PNG]]
[[Image:m_ {{{D10}}}.PNG]]
[[Image:m_ {{{D11}}}.PNG]]
E
[[Image:m_ {{{E1}}}.PNG]]
[[Image:m_ {{{E2}}}.PNG]]
[[Image:m_ {{{E3}}}.PNG]]
[[Image:m_ {{{E4}}}.PNG]]
[[Image:m_ {{{E5}}}.PNG]]
[[Image:m_ {{{E6}}}.PNG]]
[[Image:m_ {{{E7}}}.PNG]]
[[Image:m_ {{{E8}}}.PNG]]
[[Image:m_ {{{E9}}}.PNG]]
[[Image:m_ {{{E10}}}.PNG]]
[[Image:m_ {{{E11}}}.PNG]]
F
[[Image:m_ {{{F1}}}.PNG]]
[[Image:m_ {{{F2}}}.PNG]]
[[Image:m_ {{{F3}}}.PNG]]
[[Image:m_ {{{F4}}}.PNG]]
[[Image:m_ {{{F5}}}.PNG]]
[[Image:m_ {{{F6}}}.PNG]]
[[Image:m_ {{{F7}}}.PNG]]
[[Image:m_ {{{F8}}}.PNG]]
[[Image:m_ {{{F9}}}.PNG]]
[[Image:m_ {{{F10}}}.PNG]]
[[Image:m_ {{{F11}}}.PNG]]
G
[[Image:m_ {{{G1}}}.PNG]]
[[Image:m_ {{{G2}}}.PNG]]
[[Image:m_ {{{G3}}}.PNG]]
[[Image:m_ {{{G4}}}.PNG]]
[[Image:m_ {{{G5}}}.PNG]]
[[Image:m_ {{{G6}}}.PNG]]
[[Image:m_ {{{G7}}}.PNG]]
[[Image:m_ {{{G8}}}.PNG]]
[[Image:m_ {{{G9}}}.PNG]]
[[Image:m_ {{{G10}}}.PNG]]
[[Image:m_ {{{G11}}}.PNG]]
H
[[Image:m_ {{{H1}}}.PNG]]
[[Image:m_ {{{H2}}}.PNG]]
[[Image:m_ {{{H3}}}.PNG]]
[[Image:m_ {{{H4}}}.PNG]]
[[Image:m_ {{{H5}}}.PNG]]
[[Image:m_ {{{H6}}}.PNG]]
[[Image:m_ {{{H7}}}.PNG]]
[[Image:m_ {{{H8}}}.PNG]]
[[Image:m_ {{{H9}}}.PNG]]
[[Image:m_ {{{H10}}}.PNG]]
[[Image:m_ {{{H11}}}.PNG]]
I
[[Image:m_ {{{I1}}}.PNG]]
[[Image:m_ {{{I2}}}.PNG]]
[[Image:m_ {{{I3}}}.PNG]]
[[Image:m_ {{{I4}}}.PNG]]
[[Image:m_ {{{I5}}}.PNG]]
[[Image:m_ {{{I6}}}.PNG]]
[[Image:m_ {{{I7}}}.PNG]]
[[Image:m_ {{{I8}}}.PNG]]
[[Image:m_ {{{I9}}}.PNG]]
[[Image:m_ {{{I10}}}.PNG]]
[[Image:m_ {{{I11}}}.PNG]]
I
[[Image:m_ {{{J1}}}.PNG]]
[[Image:m_ {{{J2}}}.PNG]]
[[Image:m_ {{{J3}}}.PNG]]
[[Image:m_ {{{J4}}}.PNG]]
[[Image:m_ {{{J5}}}.PNG]]
[[Image:m_ {{{J6}}}.PNG]]
[[Image:m_ {{{J7}}}.PNG]]
[[Image:m_ {{{J8}}}.PNG]]
[[Image:m_ {{{J9}}}.PNG]]
[[Image:m_ {{{J10}}}.PNG]]
[[Image:m_ {{{J11}}}.PNG]]
I
[[Image:m_ {{{K1}}}.PNG]]
[[Image:m_ {{{K2}}}.PNG]]
[[Image:m_ {{{K3}}}.PNG]]
[[Image:m_ {{{K4}}}.PNG]]
[[Image:m_ {{{K5}}}.PNG]]
[[Image:m_ {{{K6}}}.PNG]]
[[Image:m_ {{{K7}}}.PNG]]
[[Image:m_ {{{K8}}}.PNG]]
[[Image:m_ {{{K9}}}.PNG]]
[[Image:m_ {{{K10}}}.PNG]]
[[Image:m_ {{{K11}}}.PNG]]
Very Hard (Level 18-18)
1
2
3
4
5
6
7
8
9
10
11
A
[[Image:m_ {{{A1}}}.PNG]]
[[Image:m_ {{{A7}}}.PNG]]
[[Image:m_ {{{A8}}}.PNG]]
[[Image:m_ {{{A9}}}.PNG]]
[[Image:m_ {{{A10}}}.PNG]]
[[Image:m_ {{{A11}}}.PNG]]
B
[[Image:m_ {{{B1}}}.PNG]]
[[Image:m_ {{{B2}}}.PNG]]
[[Image:m_ {{{B3}}}.PNG]]
[[Image:m_ {{{B4}}}.PNG]]
[[Image:m_ {{{B5}}}.PNG]]
[[Image:m_ {{{B6}}}.PNG]]
[[Image:m_ {{{B7}}}.PNG]]
[[Image:m_ {{{B8}}}.PNG]]
[[Image:m_ {{{B9}}}.PNG]]
[[Image:m_ {{{B10}}}.PNG]]
[[Image:m_ {{{B11}}}.PNG]]
C
[[Image:m_ {{{C1}}}.PNG]]
[[Image:m_ {{{C2}}}.PNG]]
[[Image:m_ {{{C3}}}.PNG]]
[[Image:m_ {{{C4}}}.PNG]]
[[Image:m_ {{{C5}}}.PNG]]
[[Image:m_ {{{C6}}}.PNG]]
[[Image:m_ {{{C7}}}.PNG]]
[[Image:m_ {{{C8}}}.PNG]]
[[Image:m_ {{{C9}}}.PNG]]
[[Image:m_ {{{C10}}}.PNG]]
[[Image:m_ {{{C11}}}.PNG]]
D
[[Image:m_ {{{D1}}}.PNG]]
[[Image:m_ {{{D2}}}.PNG]]
[[Image:m_ {{{D3}}}.PNG]]
[[Image:m_ {{{D4}}}.PNG]]
[[Image:m_ {{{D5}}}.PNG]]
[[Image:m_ {{{D6}}}.PNG]]
[[Image:m_ {{{D7}}}.PNG]]
[[Image:m_ {{{D8}}}.PNG]]
[[Image:m_ {{{D9}}}.PNG]]
[[Image:m_ {{{D10}}}.PNG]]
[[Image:m_ {{{D11}}}.PNG]]
E
[[Image:m_ {{{E1}}}.PNG]]
[[Image:m_ {{{E2}}}.PNG]]
[[Image:m_ {{{E3}}}.PNG]]
[[Image:m_ {{{E4}}}.PNG]]
[[Image:m_ {{{E5}}}.PNG]]
[[Image:m_ {{{E6}}}.PNG]]
[[Image:m_ {{{E7}}}.PNG]]
[[Image:m_ {{{E8}}}.PNG]]
[[Image:m_ {{{E9}}}.PNG]]
[[Image:m_ {{{E10}}}.PNG]]
[[Image:m_ {{{E11}}}.PNG]]
F
[[Image:m_ {{{F1}}}.PNG]]
[[Image:m_ {{{F2}}}.PNG]]
[[Image:m_ {{{F3}}}.PNG]]
[[Image:m_ {{{F4}}}.PNG]]
[[Image:m_ {{{F5}}}.PNG]]
[[Image:m_ {{{F6}}}.PNG]]
[[Image:m_ {{{F7}}}.PNG]]
[[Image:m_ {{{F8}}}.PNG]]
[[Image:m_ {{{F9}}}.PNG]]
[[Image:m_ {{{F10}}}.PNG]]
[[Image:m_ {{{F11}}}.PNG]]
G
[[Image:m_ {{{G1}}}.PNG]]
[[Image:m_ {{{G2}}}.PNG]]
[[Image:m_ {{{G3}}}.PNG]]
[[Image:m_ {{{G4}}}.PNG]]
[[Image:m_ {{{G5}}}.PNG]]
[[Image:m_ {{{G6}}}.PNG]]
[[Image:m_ {{{G7}}}.PNG]]
[[Image:m_ {{{G8}}}.PNG]]
[[Image:m_ {{{G9}}}.PNG]]
[[Image:m_ {{{G10}}}.PNG]]
[[Image:m_ {{{G11}}}.PNG]]
H
[[Image:m_ {{{H1}}}.PNG]]
[[Image:m_ {{{H2}}}.PNG]]
[[Image:m_ {{{H3}}}.PNG]]
[[Image:m_ {{{H4}}}.PNG]]
[[Image:m_ {{{H5}}}.PNG]]
[[Image:m_ {{{H6}}}.PNG]]
[[Image:m_ {{{H7}}}.PNG]]
[[Image:m_ {{{H8}}}.PNG]]
[[Image:m_ {{{H9}}}.PNG]]
[[Image:m_ {{{H10}}}.PNG]]
[[Image:m_ {{{H11}}}.PNG]]
I
[[Image:m_ {{{I1}}}.PNG]]
[[Image:m_ {{{I2}}}.PNG]]
[[Image:m_ {{{I3}}}.PNG]]
[[Image:m_ {{{I4}}}.PNG]]
[[Image:m_ {{{I5}}}.PNG]]
[[Image:m_ {{{I6}}}.PNG]]
[[Image:m_ {{{I7}}}.PNG]]
[[Image:m_ {{{I8}}}.PNG]]
[[Image:m_ {{{I9}}}.PNG]]
[[Image:m_ {{{I10}}}.PNG]]
[[Image:m_ {{{I11}}}.PNG]]
I
[[Image:m_ {{{J1}}}.PNG]]
[[Image:m_ {{{J2}}}.PNG]]
[[Image:m_ {{{J3}}}.PNG]]
[[Image:m_ {{{J4}}}.PNG]]
[[Image:m_ {{{J5}}}.PNG]]
[[Image:m_ {{{J6}}}.PNG]]
[[Image:m_ {{{J7}}}.PNG]]
[[Image:m_ {{{J8}}}.PNG]]
[[Image:m_ {{{J9}}}.PNG]]
[[Image:m_ {{{J10}}}.PNG]]
[[Image:m_ {{{J11}}}.PNG]]
I
[[Image:m_ {{{K1}}}.PNG]]
[[Image:m_ {{{K2}}}.PNG]]
[[Image:m_ {{{K3}}}.PNG]]
[[Image:m_ {{{K4}}}.PNG]]
[[Image:m_ {{{K5}}}.PNG]]
[[Image:m_ {{{K6}}}.PNG]]
[[Image:m_ {{{K7}}}.PNG]]
[[Image:m_ {{{K8}}}.PNG]]
[[Image:m_ {{{K9}}}.PNG]]
[[Image:m_ {{{K10}}}.PNG]]
[[Image:m_ {{{K11}}}.PNG]]
Champion (Level 19-19)
1
2
3
4
5
6
7
8
9
10
11
A
[[Image:m_ {{{A1}}}.PNG]]
[[Image:m_ {{{A7}}}.PNG]]
[[Image:m_ {{{A8}}}.PNG]]
[[Image:m_ {{{A9}}}.PNG]]
[[Image:m_ {{{A10}}}.PNG]]
[[Image:m_ {{{A11}}}.PNG]]
B
[[Image:m_ {{{B1}}}.PNG]]
[[Image:m_ {{{B2}}}.PNG]]
[[Image:m_ {{{B3}}}.PNG]]
[[Image:m_ {{{B4}}}.PNG]]
[[Image:m_ {{{B5}}}.PNG]]
[[Image:m_ {{{B6}}}.PNG]]
[[Image:m_ {{{B7}}}.PNG]]
[[Image:m_ {{{B8}}}.PNG]]
[[Image:m_ {{{B9}}}.PNG]]
[[Image:m_ {{{B10}}}.PNG]]
[[Image:m_ {{{B11}}}.PNG]]
C
[[Image:m_ {{{C1}}}.PNG]]
[[Image:m_ {{{C2}}}.PNG]]
[[Image:m_ {{{C3}}}.PNG]]
[[Image:m_ {{{C4}}}.PNG]]
[[Image:m_ {{{C5}}}.PNG]]
[[Image:m_ {{{C6}}}.PNG]]
[[Image:m_ {{{C7}}}.PNG]]
[[Image:m_ {{{C8}}}.PNG]]
[[Image:m_ {{{C9}}}.PNG]]
[[Image:m_ {{{C10}}}.PNG]]
[[Image:m_ {{{C11}}}.PNG]]
D
[[Image:m_ {{{D1}}}.PNG]]
[[Image:m_ {{{D2}}}.PNG]]
[[Image:m_ {{{D3}}}.PNG]]
[[Image:m_ {{{D4}}}.PNG]]
[[Image:m_ {{{D5}}}.PNG]]
[[Image:m_ {{{D6}}}.PNG]]
[[Image:m_ {{{D7}}}.PNG]]
[[Image:m_ {{{D8}}}.PNG]]
[[Image:m_ {{{D9}}}.PNG]]
[[Image:m_ {{{D10}}}.PNG]]
[[Image:m_ {{{D11}}}.PNG]]
E
[[Image:m_ {{{E1}}}.PNG]]
[[Image:m_ {{{E2}}}.PNG]]
[[Image:m_ {{{E3}}}.PNG]]
[[Image:m_ {{{E4}}}.PNG]]
[[Image:m_ {{{E5}}}.PNG]]
[[Image:m_ {{{E6}}}.PNG]]
[[Image:m_ {{{E7}}}.PNG]]
[[Image:m_ {{{E8}}}.PNG]]
[[Image:m_ {{{E9}}}.PNG]]
[[Image:m_ {{{E10}}}.PNG]]
[[Image:m_ {{{E11}}}.PNG]]
F
[[Image:m_ {{{F1}}}.PNG]]
[[Image:m_ {{{F2}}}.PNG]]
[[Image:m_ {{{F3}}}.PNG]]
[[Image:m_ {{{F4}}}.PNG]]
[[Image:m_ {{{F5}}}.PNG]]
[[Image:m_ {{{F6}}}.PNG]]
[[Image:m_ {{{F7}}}.PNG]]
[[Image:m_ {{{F8}}}.PNG]]
[[Image:m_ {{{F9}}}.PNG]]
[[Image:m_ {{{F10}}}.PNG]]
[[Image:m_ {{{F11}}}.PNG]]
G
[[Image:m_ {{{G1}}}.PNG]]
[[Image:m_ {{{G2}}}.PNG]]
[[Image:m_ {{{G3}}}.PNG]]
[[Image:m_ {{{G4}}}.PNG]]
[[Image:m_ {{{G5}}}.PNG]]
[[Image:m_ {{{G6}}}.PNG]]
[[Image:m_ {{{G7}}}.PNG]]
[[Image:m_ {{{G8}}}.PNG]]
[[Image:m_ {{{G9}}}.PNG]]
[[Image:m_ {{{G10}}}.PNG]]
[[Image:m_ {{{G11}}}.PNG]]
H
[[Image:m_ {{{H1}}}.PNG]]
[[Image:m_ {{{H2}}}.PNG]]
[[Image:m_ {{{H3}}}.PNG]]
[[Image:m_ {{{H4}}}.PNG]]
[[Image:m_ {{{H5}}}.PNG]]
[[Image:m_ {{{H6}}}.PNG]]
[[Image:m_ {{{H7}}}.PNG]]
[[Image:m_ {{{H8}}}.PNG]]
[[Image:m_ {{{H9}}}.PNG]]
[[Image:m_ {{{H10}}}.PNG]]
[[Image:m_ {{{H11}}}.PNG]]
I
[[Image:m_ {{{I1}}}.PNG]]
[[Image:m_ {{{I2}}}.PNG]]
[[Image:m_ {{{I3}}}.PNG]]
[[Image:m_ {{{I4}}}.PNG]]
[[Image:m_ {{{I5}}}.PNG]]
[[Image:m_ {{{I6}}}.PNG]]
[[Image:m_ {{{I7}}}.PNG]]
[[Image:m_ {{{I8}}}.PNG]]
[[Image:m_ {{{I9}}}.PNG]]
[[Image:m_ {{{I10}}}.PNG]]
[[Image:m_ {{{I11}}}.PNG]]
I
[[Image:m_ {{{J1}}}.PNG]]
[[Image:m_ {{{J2}}}.PNG]]
[[Image:m_ {{{J3}}}.PNG]]
[[Image:m_ {{{J4}}}.PNG]]
[[Image:m_ {{{J5}}}.PNG]]
[[Image:m_ {{{J6}}}.PNG]]
[[Image:m_ {{{J7}}}.PNG]]
[[Image:m_ {{{J8}}}.PNG]]
[[Image:m_ {{{J9}}}.PNG]]
[[Image:m_ {{{J10}}}.PNG]]
[[Image:m_ {{{J11}}}.PNG]]
I
[[Image:m_ {{{K1}}}.PNG]]
[[Image:m_ {{{K2}}}.PNG]]
[[Image:m_ {{{K3}}}.PNG]]
[[Image:m_ {{{K4}}}.PNG]]
[[Image:m_ {{{K5}}}.PNG]]
[[Image:m_ {{{K6}}}.PNG]]
[[Image:m_ {{{K7}}}.PNG]]
[[Image:m_ {{{K8}}}.PNG]]
[[Image:m_ {{{K9}}}.PNG]]
[[Image:m_ {{{K10}}}.PNG]]
[[Image:m_ {{{K11}}}.PNG]]
Monsters Story Demons attack her endlessly as she approaches, and Edel finially succeeds in reaching her brother's room after disposing of dozens of giant arachne and cursed guards. Within it, she meets Countess Arachne , the head demon responsible for the spider horde, along with a massive dimensional portal. A grueling fight ensues, ending in the countess's defeat. Before Edel can finish her off and end the invasion, the countess begs the Captain to allow her to live in exchange for saving her brother. Unsurprisingly, this turns out to be a ruse and Edel barely dodges the countess's attack. In retaliation to the trickery, Edel kills the head arachne in cold blood. However, the dimensional portal vanishes, taking Adel with it. Recalling Dreyfus's words that Adel could be sent to anywhere in Aernas or the demon realm, Edel decides to head to Serdin to seek help.
Dialogue Beginning (Edel rushes into the room and uses Frenzy Sprint and follows up her attack with Circular.)Edel: Edel:
Second Room Edel: Edel:
Progressing in the Second Room Edel:
Boss Edel: Countess Arachne: Oh~? A human... You must be a Frost... You look delicious!Edel: Countess Arachne: Hmm~ All I did was come through the gate and release all my babies in here. Why are you so mad? Were they too rough on you?Edel: Countess Arachne: Oh, him? You see that opened gate over there? He should be in there somewhere, I can't promise if you'll find him or not though~Edel: Countess Arachne: Such threatening words from a little girl~ I guess I can play with you for a bit.
Post Boss Battle Countess Arachne: How... How can a Frost be this strong...?!Edel: Countess Arachne: Wait! If you kill me now, you will never see your dear brother again!Edel: Countess Arachne: Yes, you won't be able to save him. However, this is the gate I came through, of course I know how to save him. If you spare me, I will bring back your brother.Edel: Countess Arachne: I'm not lying, now would you mind removing your sword from me~?Edel: Countess Arachne: Thank you~ I will go and... kill your brother! Hahahaha!Edel: Countess Arachne: H-Hold on... No... wait...! Kyaaaaaaaaaah!Edel: Edel: Edel: Edel:
Trivia 


 : Level 16


 Edel: Out of my way!!!