No edit summary |
No edit summary |
||
| (28 intermediate revisions by 12 users not shown) | |||
| Line 1: | Line 1: | ||
{{Ellia Continent}} |
{{Ellia Continent}} |
||
| − | '''Kamiki Castle''' (once Ellia Continent) is the fourteenth dungeon in the game and the second on [[Ellia |
+ | '''Kamiki's Castle''' (once '''Ellia Continent''') is the fourteenth dungeon in the game and the second on [[Ellia]]. This dungeon also marks [[Lass]]'s second appearance. |
| + | [[Kaze'aze]] [[Lass]] appears here, remarking the Chase's arrival. [[Ryan]] and [[Ronan]] demand the "child" is no other than[[File:Sky27.png|thumb|350px|Background of Kamiki's Castle]] Kaze'aze. [[Arme]] becomes confused, and Ronan comments that Kaze'aze possessed the boy. [[Elesis]] demands her [[Elscud|father]] but Kaze'aze Lass denies and leaves afterward, letting them "have fun" with her minions.<br /> |
||
| − | Kamiki Castle contains one of the Kaze'aze's Map Pieces needed to unlock [[Kaze'aze's Castle]]. |
||
| + | Midway through the area, the group encounters strange markings. According to a rumor, a [[Zero|vagabond knight]] called a "[[Wanderer]]," drags [[Grandark|something behind him and leaving a trail]], suggesting that this "Wanderer" came by here.<br /> |
||
| + | Deep in the plains, the group encounters [[Elena]], an Elder of the [[Violet Mage]]s. The Chase learn that she has been manipulated by Kaze'aze and is forced to take her down.<br /> |
||
| + | After defeating Elena, Kaze'aze Lass returns and revives the fallen Mage, who has become a demon named [[Kamiki]]. Kaze'aze Lass leaves as the Chase engage Kamiki.<br /> |
||
| + | In the aftermath, Arme mourns Elena. [[Lire]] proceeds to ask Elesis about her father and Arme about the Violet Mage Elder, but the two remain silent. |
||
| − | == |
+ | ==Normal (40-42)== |
{{Dungeon |
{{Dungeon |
||
| ⚫ | |||
| ⚫ | |||
| ⚫ | |||
| ⚫ | |||
| ⚫ | |||
| ⚫ | |||
|C3=room |
|C3=room |
||
|C4=harrow |
|C4=harrow |
||
| Line 12: | Line 22: | ||
|C6=harrow |
|C6=harrow |
||
|C7=room |
|C7=room |
||
| − | | |
+ | |D1=varrow |
| ⚫ | |||
| ⚫ | |||
| ⚫ | |||
| ⚫ | |||
| ⚫ | |||
| ⚫ | |||
| ⚫ | |||
| ⚫ | |||
| ⚫ | |||
| ⚫ | |||
| ⚫ | |||
| ⚫ | |||
| ⚫ | |||
| ⚫ | |||
| ⚫ | |||
| − | |H3=varrow |
||
| ⚫ | |||
}} |
}} |
||
| + | |||
| ⚫ | |||
| + | ==Hard (41-43)== |
||
{{Dungeon |
{{Dungeon |
||
| ⚫ | |||
| ⚫ | |||
| ⚫ | |||
| ⚫ | |||
| ⚫ | |||
| ⚫ | |||
|C3=room |
|C3=room |
||
|C4=harrow |
|C4=harrow |
||
| Line 38: | Line 40: | ||
|C6=harrow |
|C6=harrow |
||
|C7=room |
|C7=room |
||
| − | | |
+ | |D1=varrow |
| ⚫ | |||
| − | |D7=varrow |
||
| − | |E1=room |
||
| ⚫ | |||
| − | |E3=room |
||
| ⚫ | |||
| ⚫ | |||
| − | |E9=room |
||
| − | |F3=varrow |
||
| − | |F9=varrow |
||
| − | |G3=room |
||
| − | |G4=harrow |
||
| − | |G5=room |
||
| − | |G6=harrow |
||
| − | |G7=room |
||
| − | |G8=harrow |
||
| − | |G9=room |
||
| − | |H3=varrow |
||
| − | |H7=varrow |
||
| ⚫ | |||
| − | |I7=room |
||
}} |
}} |
||
| + | |||
| − | ==Three Star (34-37)== |
||
| ⚫ | |||
{{Dungeon |
{{Dungeon |
||
| − | |A5= |
+ | |A5=boss |
| ⚫ | |||
| − | |B5=varrow |
||
| ⚫ | |||
| ⚫ | |||
| ⚫ | |||
| ⚫ | |||
|C3=room |
|C3=room |
||
|C4=harrow |
|C4=harrow |
||
| Line 69: | Line 57: | ||
|C6=harrow |
|C6=harrow |
||
|C7=room |
|C7=room |
||
| − | | |
+ | |D1=varrow |
| ⚫ | |||
| − | |D7=varrow |
||
| − | |E1=room |
||
| − | |E2=harrow |
||
| − | |E3=room |
||
| − | |E7=boss |
||
| − | |E8=harrow |
||
| − | |E9=room |
||
| − | |E10=harrow |
||
| − | |E11=room |
||
| − | |F3=varrow |
||
| − | |F9=varrow |
||
| − | |G3=room |
||
| − | |G4=harrow |
||
| − | |G5=room |
||
| − | |G6=harrow |
||
| − | |G7=room |
||
| − | |G8=harrow |
||
| − | |G9=room |
||
| − | |H3=varrow |
||
| − | |H7=varrow |
||
| ⚫ | |||
| − | |I7=room |
||
}} |
}} |
||
| + | |||
| − | ==Champion ( |
+ | ==Champion Mode (43-45)== |
{{Dungeon |
{{Dungeon |
||
|A5=boss |
|A5=boss |
||
| Line 109: | Line 77: | ||
|E1=start |
|E1=start |
||
}} |
}} |
||
| + | |||
==Monsters== |
==Monsters== |
||
| − | *[[ |
+ | *[[Dark Anmon Scout]] |
| − | *[[ |
+ | *[[Dark Anmon Guard]] |
*[[Mongban|Mongban Leader]] |
*[[Mongban|Mongban Leader]] |
||
*[[Mongban|Dark Mongban]] |
*[[Mongban|Dark Mongban]] |
||
*[[Dark Mage]] |
*[[Dark Mage]] |
||
| − | *[[Elena]] (Boss |
+ | *[[Elena]] (Boss) |
| − | *[[Kamiki]] (Boss |
+ | *[[Kamiki]] (Boss) |
| + | ==Dialogue== |
||
| + | ===Beginning=== |
||
| + | {{Lired}} This is an extremely dark place.<br /> |
||
| + | '''Kaze'aze Lass:''' Have you finally come, Grand Chase?<br /> |
||
| + | {{Ryand}} Y-you're [[Kaze'aze]]!<br /> |
||
| + | {{Armed}} That's Kaze'aze?<br /> |
||
| + | {{Ronand}} Ah, Miss Arme, I guess you didn't see before. That is indeed Kaze'aze. She possessed the body of that child you see before you.<br /> |
||
| + | {{Elesisd}} Kaze'aze! What have you done with my [[Elscud|father]]? Tell me now or I'll...!<br /> |
||
| + | '''Kaze'aze Lass:''' Kkkkrrrk...I don't know what you're talking about. Now, have fun playing with my minions. Hahahahahaha!<br /> |
||
| + | {{Elesisd}} Kaze'aze! Aaarrrgh!<br /> |
||
| + | {{Armed}} Um, Elesis?<br /> |
||
| + | {{Elesisd}} ...... It's nothing. Let's go and take care of these enemies first.<br /> |
||
| + | {{Armed}} Elesis, by any chance, you didn't... |
||
| + | |||
| + | ===Midway=== |
||
| + | {{Ryand}} What? What are these giant marks? Something definitely disturbed the earth here.<br /> |
||
| + | {{Lired}} These marks...Someone other than us was definitely here!<br /> |
||
| + | {{Ronand}} Mmm...well, I have heard of this rumor about a [[Zero|vagabond knight]] called a "[[Wanderer]]," who supposedly drags [[Grandark|something behind him and leaving a trail.]]<br /> |
||
| + | {{Armed}} Ah...I think I've heard of that rumor too.<br /> |
||
| + | {{Jind}} Hey, everyone! Watch out, there are other monsters heading towards us!<br /> |
||
| + | {{Elesisd}} Yeah, we can discuss rumors later. Right now, we need to focus on these monsters! |
||
| + | |||
| + | ===Boss (Part 1)=== |
||
| + | {{Elesisd}} Ha-ah! Ha-ah! Now! Who's next?<br /> |
||
| + | {{Lired}} Miss Elesis, please calm down. Why are you so...<br /> |
||
| + | '''Elena:''' So you're the little children who are creating a nuisance for Lady Kaze'aze. Ho ho ho.<br /> |
||
| + | {{Armed}} Oh no, Miss Elena! How can you? What happened to the [[Violet Mage]]s? Why are you here?<br /> |
||
| + | '''Elena:''' Ho ho ho. Lady Kaze'aze gave me this land, that is why I'm here.<br /> |
||
| + | {{Elesisd}} Then defeating you will be the key to finding Kaze'aze!<br /> |
||
| + | {{Armed}} Elesis! Please calm down! Elena isn't just anyone! She's one of the Elders of the Violet Mages!<br /> |
||
| + | {{Elesisd}} Shut up! She's under Kaze'aze's control, I must stop her!<br /> |
||
| + | {{Lired}} Temper, temper, both of you! Miss Arme, Elena no longer appears to be a mage of justice. Please take notice of her aura.<br /> |
||
| + | {{Armed}} Ohhh...was Miss Elena truly being manipulated by Kaze'aze?<br /> |
||
| + | '''Elena:''' Ah~ This is why kids are so difficult to handle. Do you understand now? It's time for me to make you all disappear, for my ambitions and Lady Kaze'aze's.<br /> |
||
| + | {{Ronand}} She's coming! Everyone, look out! |
||
| + | |||
| + | ===Boss (Part 2)=== |
||
| + | '''Kaze'aze Lass:''' Well, well, well. Isn't it a crying shame that it must all end here? Rise, [[Kamiki]], in the name of Darkness!<br /> |
||
| + | (Kamiki spawns out of nowhere)<br /> |
||
| + | '''Kaze'aze Lass:''' I invoke your new name, beseech thee to become a Spirit of Rage and take your enemies to hell to burn!<br /> |
||
| + | {{Elesisd}} Ha! Give me everything you've got! |
||
| + | |||
| + | ===Post Boss Battle=== |
||
| + | '''Kamiki:''' L-Lady Kaze'aze...Kyaaaaak!<br /> |
||
| + | {{Armed}} Ohhh...Miss Elena...<br /> |
||
| + | {{Elesisd}} Where did Kaze'aze run off to now?<br /> |
||
| + | {{Jind}} What in the...what's going on here?<br /> |
||
| + | {{Lired}} Miss Elesis? Earlier you said something about your father. Could you please tell us what's going on?<br /> |
||
| + | {{Elesisd}} ...Just a slip of the tongue. Don't concern yourselves over it.<br /> |
||
| + | {{Lired}} ... Miss Arme? What did you mean by Elena is an Elder of the Violet Mages? What is going on?<br /> |
||
| + | {{Armed}} *Sniff* Don't worry about it.<br /> |
||
| + | {{Lired}} ...<br /> |
||
| + | {{Jind}} ... |
||
==Trivia== |
==Trivia== |
||
| − | *Originally the dungeon was named "Ellia Continent" or "Ellia Empire", but it was changed for obvious reasons. |
+ | *Originally the dungeon was named '''"Ellia Continent"''' or '''"Ellia Empire"''', but it was changed for obvious reasons. |
| + | *Strangely, the layout isn't a "Castle", but more like an "Outer Field". |
||
| − | *Although Lass "appears" here, he only comes in the form of a |
+ | *Although [[Lass]] "appears" here, he only comes in the form of a dialogue, not in character. |
| + | *This dungeon confirms that Lass is a child; no more than 13. |
||
| + | |||
{{Dungeons}} |
{{Dungeons}} |
||
| + | [[Category:Dungeons]] |
||
Latest revision as of 09:20, 2 May 2013


 : Level 32-35
- : Level 33-36
- : Level 34-37
![]() : Level 37-40
: Level 37-40
Kamiki's Castle (once Ellia Continent) is the fourteenth dungeon in the game and the second on Ellia. This dungeon also marks Lass's second appearance.
Kaze'aze Lass appears here, remarking the Chase's arrival. Ryan and Ronan demand the "child" is no other than

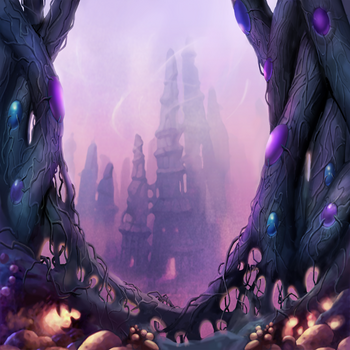
Background of Kamiki's Castle
Kaze'aze. Arme becomes confused, and Ronan comments that Kaze'aze possessed the boy. Elesis demands her father but Kaze'aze Lass denies and leaves afterward, letting them "have fun" with her minions.
Midway through the area, the group encounters strange markings. According to a rumor, a vagabond knight called a "Wanderer," drags something behind him and leaving a trail, suggesting that this "Wanderer" came by here.
Deep in the plains, the group encounters Elena, an Elder of the Violet Mages. The Chase learn that she has been manipulated by Kaze'aze and is forced to take her down.
After defeating Elena, Kaze'aze Lass returns and revives the fallen Mage, who has become a demon named Kamiki. Kaze'aze Lass leaves as the Chase engage Kamiki.
In the aftermath, Arme mourns Elena. Lire proceeds to ask Elesis about her father and Arme about the Violet Mage Elder, but the two remain silent.
Normal (40-42)
| 1 | 5 | 6 | 7 | ||||||||
|---|---|---|---|---|---|---|---|---|---|---|---|
| A | 
|
||||||||||
| C | |||||||||||
| D | |||||||||||
| E | 
|
||||||||||
Hard (41-43)
| 1 | 5 | 6 | 7 | ||||||||
|---|---|---|---|---|---|---|---|---|---|---|---|
| A |
|
||||||||||
| C | |||||||||||
| D | |||||||||||
| E |
|
||||||||||
Very Hard (42-44)
| 1 | 5 | 6 | 7 | ||||||||
|---|---|---|---|---|---|---|---|---|---|---|---|
| A |
|
||||||||||
| C | |||||||||||
| D | |||||||||||
| E |
|
||||||||||
Champion Mode (43-45)
| 1 | 5 | 6 | 7 | ||||||||
|---|---|---|---|---|---|---|---|---|---|---|---|
| A |
|
||||||||||
| C | |||||||||||
| D | |||||||||||
| E |
|
||||||||||
Monsters
- Dark Anmon Scout
- Dark Anmon Guard
- Mongban Leader
- Dark Mongban
- Dark Mage
- Elena (Boss)
- Kamiki (Boss)
Dialogue
Beginning
 Lire: This is an extremely dark place.
Kaze'aze Lass: Have you finally come, Grand Chase?
 Ryan: Y-you're Kaze'aze!
 Arme: That's Kaze'aze?
 Ronan: Ah, Miss Arme, I guess you didn't see before. That is indeed Kaze'aze. She possessed the body of that child you see before you.
 Elesis: Kaze'aze! What have you done with my father? Tell me now or I'll...!
Kaze'aze Lass: Kkkkrrrk...I don't know what you're talking about. Now, have fun playing with my minions. Hahahahahaha!
Elesis: Kaze'aze! Aaarrrgh!
Arme: Um, Elesis?
Elesis: ...... It's nothing. Let's go and take care of these enemies first.
Arme: Elesis, by any chance, you didn't...
Midway
Ryan: What? What are these giant marks? Something definitely disturbed the earth here.
Lire: These marks...Someone other than us was definitely here!
Ronan: Mmm...well, I have heard of this rumor about a vagabond knight called a "Wanderer," who supposedly drags something behind him and leaving a trail.
Arme: Ah...I think I've heard of that rumor too.
 Jin: Hey, everyone! Watch out, there are other monsters heading towards us!
Elesis: Yeah, we can discuss rumors later. Right now, we need to focus on these monsters!
Boss (Part 1)
Elesis: Ha-ah! Ha-ah! Now! Who's next?
Lire: Miss Elesis, please calm down. Why are you so...
Elena: So you're the little children who are creating a nuisance for Lady Kaze'aze. Ho ho ho.
Arme: Oh no, Miss Elena! How can you? What happened to the Violet Mages? Why are you here?
Elena: Ho ho ho. Lady Kaze'aze gave me this land, that is why I'm here.
Elesis: Then defeating you will be the key to finding Kaze'aze!
Arme: Elesis! Please calm down! Elena isn't just anyone! She's one of the Elders of the Violet Mages!
Elesis: Shut up! She's under Kaze'aze's control, I must stop her!
Lire: Temper, temper, both of you! Miss Arme, Elena no longer appears to be a mage of justice. Please take notice of her aura.
Arme: Ohhh...was Miss Elena truly being manipulated by Kaze'aze?
Elena: Ah~ This is why kids are so difficult to handle. Do you understand now? It's time for me to make you all disappear, for my ambitions and Lady Kaze'aze's.
Ronan: She's coming! Everyone, look out!
Boss (Part 2)
Kaze'aze Lass: Well, well, well. Isn't it a crying shame that it must all end here? Rise, Kamiki, in the name of Darkness!
(Kamiki spawns out of nowhere)
Kaze'aze Lass: I invoke your new name, beseech thee to become a Spirit of Rage and take your enemies to hell to burn!
Elesis: Ha! Give me everything you've got!
Post Boss Battle
Kamiki: L-Lady Kaze'aze...Kyaaaaak!
Arme: Ohhh...Miss Elena...
Elesis: Where did Kaze'aze run off to now?
Jin: What in the...what's going on here?
Lire: Miss Elesis? Earlier you said something about your father. Could you please tell us what's going on?
Elesis: ...Just a slip of the tongue. Don't concern yourselves over it.
Lire: ... Miss Arme? What did you mean by Elena is an Elder of the Violet Mages? What is going on?
Arme: *Sniff* Don't worry about it.
Lire: ...
Jin: ...
Trivia
- Originally the dungeon was named "Ellia Continent" or "Ellia Empire", but it was changed for obvious reasons.
- Strangely, the layout isn't a "Castle", but more like an "Outer Field".
- Although Lass "appears" here, he only comes in the form of a dialogue, not in character.
- This dungeon confirms that Lass is a child; no more than 13.