Grand Chase Wiki
Advertisement
The Haunted Market

Moonlight Yokai Village

Moonlight Yokai Village BG

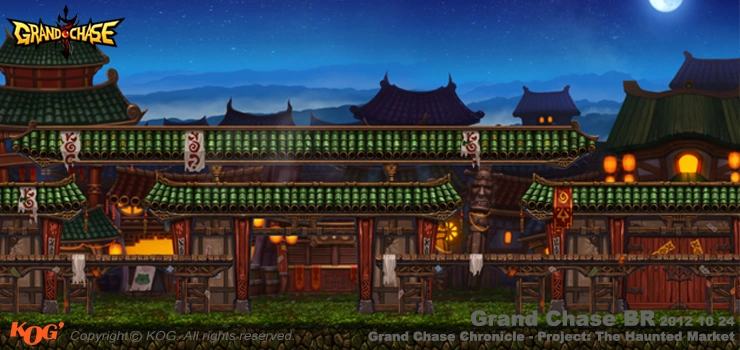
Moonlight Yokai Village Background

The Moonlight Yokai Village, also known as the Haunted Village or the Night Market, is a special event dungeon currently only available in Korea. Like the Monster Train 301, it has a Hell Mode, and it is the only dungeon so far to have three different boss routes, two of which leads to the default boss, and one which leads to the secret boss.

Normal (Level 0-80)

1 2 3 4 5 6 7 8 9 10 11
A M start M rarrow M room M rarrow M room M rarrow M room M harrow M boss [[Image:m_ {{{A10}}}.PNG]] [[Image:m_ {{{A11}}}.PNG]]
B [[Image:m_ {{{B1}}}.PNG]] [[Image:m_ {{{B2}}}.PNG]] [[Image:m_ {{{B3}}}.PNG]] [[Image:m_ {{{B4}}}.PNG]] M darrow [[Image:m_ {{{B6}}}.PNG]] [[Image:m_ {{{B7}}}.PNG]] [[Image:m_ {{{B8}}}.PNG]] [[Image:m_ {{{B9}}}.PNG]] [[Image:m_ {{{B10}}}.PNG]] [[Image:m_ {{{B11}}}.PNG]]
C [[Image:m_ {{{C1}}}.PNG]] [[Image:m_ {{{C2}}}.PNG]] [[Image:m_ {{{C3}}}.PNG]] [[Image:m_ {{{C4}}}.PNG]] M room M harrow M boss [[Image:m_ {{{C8}}}.PNG]] [[Image:m_ {{{C9}}}.PNG]] [[Image:m_ {{{C10}}}.PNG]] [[Image:m_ {{{C11}}}.PNG]]
D [[Image:m_ {{{D1}}}.PNG]] [[Image:m_ {{{D2}}}.PNG]] [[Image:m_ {{{D3}}}.PNG]] [[Image:m_ {{{D4}}}.PNG]] M varrow [[Image:m_ {{{D6}}}.PNG]] [[Image:m_ {{{D7}}}.PNG]] [[Image:m_ {{{D8}}}.PNG]] [[Image:m_ {{{D9}}}.PNG]] [[Image:m_ {{{D10}}}.PNG]] [[Image:m_ {{{D11}}}.PNG]]
E [[Image:m_ {{{E1}}}.PNG]] [[Image:m_ {{{E2}}}.PNG]] [[Image:m_ {{{E3}}}.PNG]] [[Image:m_ {{{E4}}}.PNG]] M boss [[Image:m_ {{{E6}}}.PNG]] [[Image:m_ {{{E7}}}.PNG]] [[Image:m_ {{{E8}}}.PNG]] [[Image:m_ {{{E9}}}.PNG]] [[Image:m_ {{{E10}}}.PNG]] [[Image:m_ {{{E11}}}.PNG]]
F [[Image:m_ {{{F1}}}.PNG]] [[Image:m_ {{{F2}}}.PNG]] [[Image:m_ {{{F3}}}.PNG]] [[Image:m_ {{{F4}}}.PNG]] [[Image:m_ {{{F5}}}.PNG]] [[Image:m_ {{{F6}}}.PNG]] [[Image:m_ {{{F7}}}.PNG]] [[Image:m_ {{{F8}}}.PNG]] [[Image:m_ {{{F9}}}.PNG]] [[Image:m_ {{{F10}}}.PNG]] [[Image:m_ {{{F11}}}.PNG]]
G [[Image:m_ {{{G1}}}.PNG]] [[Image:m_ {{{G2}}}.PNG]] [[Image:m_ {{{G3}}}.PNG]] [[Image:m_ {{{G4}}}.PNG]] [[Image:m_ {{{G5}}}.PNG]] [[Image:m_ {{{G6}}}.PNG]] [[Image:m_ {{{G7}}}.PNG]] [[Image:m_ {{{G8}}}.PNG]] [[Image:m_ {{{G9}}}.PNG]] [[Image:m_ {{{G10}}}.PNG]] [[Image:m_ {{{G11}}}.PNG]]
H [[Image:m_ {{{H1}}}.PNG]] [[Image:m_ {{{H2}}}.PNG]] [[Image:m_ {{{H3}}}.PNG]] [[Image:m_ {{{H4}}}.PNG]] [[Image:m_ {{{H5}}}.PNG]] [[Image:m_ {{{H6}}}.PNG]] [[Image:m_ {{{H7}}}.PNG]] [[Image:m_ {{{H8}}}.PNG]] [[Image:m_ {{{H9}}}.PNG]] [[Image:m_ {{{H10}}}.PNG]] [[Image:m_ {{{H11}}}.PNG]]
I [[Image:m_ {{{I1}}}.PNG]] [[Image:m_ {{{I2}}}.PNG]] [[Image:m_ {{{I3}}}.PNG]] [[Image:m_ {{{I4}}}.PNG]] [[Image:m_ {{{I5}}}.PNG]] [[Image:m_ {{{I6}}}.PNG]] [[Image:m_ {{{I7}}}.PNG]] [[Image:m_ {{{I8}}}.PNG]] [[Image:m_ {{{I9}}}.PNG]] [[Image:m_ {{{I10}}}.PNG]] [[Image:m_ {{{I11}}}.PNG]]
I [[Image:m_ {{{J1}}}.PNG]] [[Image:m_ {{{J2}}}.PNG]] [[Image:m_ {{{J3}}}.PNG]] [[Image:m_ {{{J4}}}.PNG]] [[Image:m_ {{{J5}}}.PNG]] [[Image:m_ {{{J6}}}.PNG]] [[Image:m_ {{{J7}}}.PNG]] [[Image:m_ {{{J8}}}.PNG]] [[Image:m_ {{{J9}}}.PNG]] [[Image:m_ {{{J10}}}.PNG]] [[Image:m_ {{{J11}}}.PNG]]
I [[Image:m_ {{{K1}}}.PNG]] [[Image:m_ {{{K2}}}.PNG]] [[Image:m_ {{{K3}}}.PNG]] [[Image:m_ {{{K4}}}.PNG]] [[Image:m_ {{{K5}}}.PNG]] [[Image:m_ {{{K6}}}.PNG]] [[Image:m_ {{{K7}}}.PNG]] [[Image:m_ {{{K8}}}.PNG]] [[Image:m_ {{{K9}}}.PNG]] [[Image:m_ {{{K10}}}.PNG]] [[Image:m_ {{{K11}}}.PNG]]

Hard (Level 0-80)

1 2 3 4 5 6 7 8 9 10 11
A M start M rarrow M room M rarrow M room M rarrow M room M harrow M boss [[Image:m_ {{{A10}}}.PNG]] [[Image:m_ {{{A11}}}.PNG]]
B [[Image:m_ {{{B1}}}.PNG]] [[Image:m_ {{{B2}}}.PNG]] [[Image:m_ {{{B3}}}.PNG]] [[Image:m_ {{{B4}}}.PNG]] M darrow [[Image:m_ {{{B6}}}.PNG]] [[Image:m_ {{{B7}}}.PNG]] [[Image:m_ {{{B8}}}.PNG]] [[Image:m_ {{{B9}}}.PNG]] [[Image:m_ {{{B10}}}.PNG]] [[Image:m_ {{{B11}}}.PNG]]
C [[Image:m_ {{{C1}}}.PNG]] [[Image:m_ {{{C2}}}.PNG]] [[Image:m_ {{{C3}}}.PNG]] [[Image:m_ {{{C4}}}.PNG]] M room M harrow M boss [[Image:m_ {{{C8}}}.PNG]] [[Image:m_ {{{C9}}}.PNG]] [[Image:m_ {{{C10}}}.PNG]] [[Image:m_ {{{C11}}}.PNG]]
D [[Image:m_ {{{D1}}}.PNG]] [[Image:m_ {{{D2}}}.PNG]] [[Image:m_ {{{D3}}}.PNG]] [[Image:m_ {{{D4}}}.PNG]] M varrow [[Image:m_ {{{D6}}}.PNG]] [[Image:m_ {{{D7}}}.PNG]] [[Image:m_ {{{D8}}}.PNG]] [[Image:m_ {{{D9}}}.PNG]] [[Image:m_ {{{D10}}}.PNG]] [[Image:m_ {{{D11}}}.PNG]]
E [[Image:m_ {{{E1}}}.PNG]] [[Image:m_ {{{E2}}}.PNG]] [[Image:m_ {{{E3}}}.PNG]] [[Image:m_ {{{E4}}}.PNG]] M boss [[Image:m_ {{{E6}}}.PNG]] [[Image:m_ {{{E7}}}.PNG]] [[Image:m_ {{{E8}}}.PNG]] [[Image:m_ {{{E9}}}.PNG]] [[Image:m_ {{{E10}}}.PNG]] [[Image:m_ {{{E11}}}.PNG]]
F [[Image:m_ {{{F1}}}.PNG]] [[Image:m_ {{{F2}}}.PNG]] [[Image:m_ {{{F3}}}.PNG]] [[Image:m_ {{{F4}}}.PNG]] [[Image:m_ {{{F5}}}.PNG]] [[Image:m_ {{{F6}}}.PNG]] [[Image:m_ {{{F7}}}.PNG]] [[Image:m_ {{{F8}}}.PNG]] [[Image:m_ {{{F9}}}.PNG]] [[Image:m_ {{{F10}}}.PNG]] [[Image:m_ {{{F11}}}.PNG]]
G [[Image:m_ {{{G1}}}.PNG]] [[Image:m_ {{{G2}}}.PNG]] [[Image:m_ {{{G3}}}.PNG]] [[Image:m_ {{{G4}}}.PNG]] [[Image:m_ {{{G5}}}.PNG]] [[Image:m_ {{{G6}}}.PNG]] [[Image:m_ {{{G7}}}.PNG]] [[Image:m_ {{{G8}}}.PNG]] [[Image:m_ {{{G9}}}.PNG]] [[Image:m_ {{{G10}}}.PNG]] [[Image:m_ {{{G11}}}.PNG]]
H [[Image:m_ {{{H1}}}.PNG]] [[Image:m_ {{{H2}}}.PNG]] [[Image:m_ {{{H3}}}.PNG]] [[Image:m_ {{{H4}}}.PNG]] [[Image:m_ {{{H5}}}.PNG]] [[Image:m_ {{{H6}}}.PNG]] [[Image:m_ {{{H7}}}.PNG]] [[Image:m_ {{{H8}}}.PNG]] [[Image:m_ {{{H9}}}.PNG]] [[Image:m_ {{{H10}}}.PNG]] [[Image:m_ {{{H11}}}.PNG]]
I [[Image:m_ {{{I1}}}.PNG]] [[Image:m_ {{{I2}}}.PNG]] [[Image:m_ {{{I3}}}.PNG]] [[Image:m_ {{{I4}}}.PNG]] [[Image:m_ {{{I5}}}.PNG]] [[Image:m_ {{{I6}}}.PNG]] [[Image:m_ {{{I7}}}.PNG]] [[Image:m_ {{{I8}}}.PNG]] [[Image:m_ {{{I9}}}.PNG]] [[Image:m_ {{{I10}}}.PNG]] [[Image:m_ {{{I11}}}.PNG]]
I [[Image:m_ {{{J1}}}.PNG]] [[Image:m_ {{{J2}}}.PNG]] [[Image:m_ {{{J3}}}.PNG]] [[Image:m_ {{{J4}}}.PNG]] [[Image:m_ {{{J5}}}.PNG]] [[Image:m_ {{{J6}}}.PNG]] [[Image:m_ {{{J7}}}.PNG]] [[Image:m_ {{{J8}}}.PNG]] [[Image:m_ {{{J9}}}.PNG]] [[Image:m_ {{{J10}}}.PNG]] [[Image:m_ {{{J11}}}.PNG]]
I [[Image:m_ {{{K1}}}.PNG]] [[Image:m_ {{{K2}}}.PNG]] [[Image:m_ {{{K3}}}.PNG]] [[Image:m_ {{{K4}}}.PNG]] [[Image:m_ {{{K5}}}.PNG]] [[Image:m_ {{{K6}}}.PNG]] [[Image:m_ {{{K7}}}.PNG]] [[Image:m_ {{{K8}}}.PNG]] [[Image:m_ {{{K9}}}.PNG]] [[Image:m_ {{{K10}}}.PNG]] [[Image:m_ {{{K11}}}.PNG]]

Hell Mode (Level 0-80)

1 2 3 4 5 6 7 8 9 10 11
A M start M rarrow M room M rarrow M room M rarrow M room M harrow M boss [[Image:m_ {{{A10}}}.PNG]] [[Image:m_ {{{A11}}}.PNG]]
B [[Image:m_ {{{B1}}}.PNG]] [[Image:m_ {{{B2}}}.PNG]] [[Image:m_ {{{B3}}}.PNG]] [[Image:m_ {{{B4}}}.PNG]] M darrow [[Image:m_ {{{B6}}}.PNG]] [[Image:m_ {{{B7}}}.PNG]] [[Image:m_ {{{B8}}}.PNG]] [[Image:m_ {{{B9}}}.PNG]] [[Image:m_ {{{B10}}}.PNG]] [[Image:m_ {{{B11}}}.PNG]]
C [[Image:m_ {{{C1}}}.PNG]] [[Image:m_ {{{C2}}}.PNG]] [[Image:m_ {{{C3}}}.PNG]] [[Image:m_ {{{C4}}}.PNG]] M room M harrow M boss [[Image:m_ {{{C8}}}.PNG]] [[Image:m_ {{{C9}}}.PNG]] [[Image:m_ {{{C10}}}.PNG]] [[Image:m_ {{{C11}}}.PNG]]
D [[Image:m_ {{{D1}}}.PNG]] [[Image:m_ {{{D2}}}.PNG]] [[Image:m_ {{{D3}}}.PNG]] [[Image:m_ {{{D4}}}.PNG]] M varrow [[Image:m_ {{{D6}}}.PNG]] [[Image:m_ {{{D7}}}.PNG]] [[Image:m_ {{{D8}}}.PNG]] [[Image:m_ {{{D9}}}.PNG]] [[Image:m_ {{{D10}}}.PNG]] [[Image:m_ {{{D11}}}.PNG]]
E [[Image:m_ {{{E1}}}.PNG]] [[Image:m_ {{{E2}}}.PNG]] [[Image:m_ {{{E3}}}.PNG]] [[Image:m_ {{{E4}}}.PNG]] M boss [[Image:m_ {{{E6}}}.PNG]] [[Image:m_ {{{E7}}}.PNG]] [[Image:m_ {{{E8}}}.PNG]] [[Image:m_ {{{E9}}}.PNG]] [[Image:m_ {{{E10}}}.PNG]] [[Image:m_ {{{E11}}}.PNG]]
F [[Image:m_ {{{F1}}}.PNG]] [[Image:m_ {{{F2}}}.PNG]] [[Image:m_ {{{F3}}}.PNG]] [[Image:m_ {{{F4}}}.PNG]] [[Image:m_ {{{F5}}}.PNG]] [[Image:m_ {{{F6}}}.PNG]] [[Image:m_ {{{F7}}}.PNG]] [[Image:m_ {{{F8}}}.PNG]] [[Image:m_ {{{F9}}}.PNG]] [[Image:m_ {{{F10}}}.PNG]] [[Image:m_ {{{F11}}}.PNG]]
G [[Image:m_ {{{G1}}}.PNG]] [[Image:m_ {{{G2}}}.PNG]] [[Image:m_ {{{G3}}}.PNG]] [[Image:m_ {{{G4}}}.PNG]] [[Image:m_ {{{G5}}}.PNG]] [[Image:m_ {{{G6}}}.PNG]] [[Image:m_ {{{G7}}}.PNG]] [[Image:m_ {{{G8}}}.PNG]] [[Image:m_ {{{G9}}}.PNG]] [[Image:m_ {{{G10}}}.PNG]] [[Image:m_ {{{G11}}}.PNG]]
H [[Image:m_ {{{H1}}}.PNG]] [[Image:m_ {{{H2}}}.PNG]] [[Image:m_ {{{H3}}}.PNG]] [[Image:m_ {{{H4}}}.PNG]] [[Image:m_ {{{H5}}}.PNG]] [[Image:m_ {{{H6}}}.PNG]] [[Image:m_ {{{H7}}}.PNG]] [[Image:m_ {{{H8}}}.PNG]] [[Image:m_ {{{H9}}}.PNG]] [[Image:m_ {{{H10}}}.PNG]] [[Image:m_ {{{H11}}}.PNG]]
I [[Image:m_ {{{I1}}}.PNG]] [[Image:m_ {{{I2}}}.PNG]] [[Image:m_ {{{I3}}}.PNG]] [[Image:m_ {{{I4}}}.PNG]] [[Image:m_ {{{I5}}}.PNG]] [[Image:m_ {{{I6}}}.PNG]] [[Image:m_ {{{I7}}}.PNG]] [[Image:m_ {{{I8}}}.PNG]] [[Image:m_ {{{I9}}}.PNG]] [[Image:m_ {{{I10}}}.PNG]] [[Image:m_ {{{I11}}}.PNG]]
I [[Image:m_ {{{J1}}}.PNG]] [[Image:m_ {{{J2}}}.PNG]] [[Image:m_ {{{J3}}}.PNG]] [[Image:m_ {{{J4}}}.PNG]] [[Image:m_ {{{J5}}}.PNG]] [[Image:m_ {{{J6}}}.PNG]] [[Image:m_ {{{J7}}}.PNG]] [[Image:m_ {{{J8}}}.PNG]] [[Image:m_ {{{J9}}}.PNG]] [[Image:m_ {{{J10}}}.PNG]] [[Image:m_ {{{J11}}}.PNG]]
I [[Image:m_ {{{K1}}}.PNG]] [[Image:m_ {{{K2}}}.PNG]] [[Image:m_ {{{K3}}}.PNG]] [[Image:m_ {{{K4}}}.PNG]] [[Image:m_ {{{K5}}}.PNG]] [[Image:m_ {{{K6}}}.PNG]] [[Image:m_ {{{K7}}}.PNG]] [[Image:m_ {{{K8}}}.PNG]] [[Image:m_ {{{K9}}}.PNG]] [[Image:m_ {{{K10}}}.PNG]] [[Image:m_ {{{K11}}}.PNG]]

Note: Potions, Bonus Recharges, and Natal Rings cannot be used in this mode.

Dialogue

Beginning

ArmejArme: Wow!! Amazing!! It looks like this village is having a huge festival!
ArmejArme: I wonder what this delicious smell is?!
(Drunken Frog walks towards the players)
Drunken Frog: Hey! You people. Croak!
RinjRin: How rude! A slimy frog like you dare to speak to us in that tone? Don't even make me consider grilling and then eating you!
Drunken Frog: From the looks of it, you guys are nooothing like the Yokais such as us. Croak! Today is a veeery important day for the ruler of this village, Headmistress! Croak! Since you humans weren't invited, I won't let you take even a steeep closer into this village! Croak!
SieghartjSieghart: How about making us an exception? We're sorry to intrude, but we can't afford to wander around the midst of this mountain anymore right now.
Drunken Frog: Agh! You idiots... Croak! You don't even realize this is all for your own safety! Croak!!
ElesisjElesis: What the heck are you talking about?! Besides, I need to eat something right now since I'm feeling as if I will die if I don't!!
Drunken Frog: Hmph! Well then! Get a taste of this! *Ptooey*
(Drunken Frog spits alcohol at the players, dealing damage)
ElesisjElesis: Ugh! W... what is this!! I can't see!! Let's try to enter the village first!!

Middle

ArmejArme: Wow! Look at all these foods~! I guess we can finally eat now?!
RonanjRonan: But we don't have any money to pay for this.
ElesisjElesis: Hungry... Hungry... Hungry~!! Let's think after we eat first!!!
LirejLire: Y, you......!
RinjRin: Kya~! So refreshing! Kind of reminds me of my hometown!
LimejLime: D! D! D! Don't tell me! I, is that... alcohol?
RinjRin: What are you saying? It's plum juice. You better drinka lot of this if you want to grow taller Lime!
LimejLime: O, ok!
AsinjAsin: Heh. It seems that your stomach is just as endlessly wide as your heart Ms. Rin.
RinjRin: What?! You purple head. I will endlessly beat you up!
AsinjAsin: Whoa. Comrade Jin! Ms. Rin is trying to hit me! I... just wanted to... be friendly with... *Sob*
JinjJin: Hmmhmm... Try to get along with each other. Rin, the allies whom you share your blood with, are the ones who are just as important and precious as your own family! And also...
RinjRin: *Punch*
JinjJin: W, why are you hitting me!

Hidden Path

Boss

Headmistress: Are you the ones who are causing commotions in this village?
RonanjRonan: W... what a beautiful woman.
JinjJin: P, pretty...
AmyjAmy: *Punch*
JinjJin: Oww! Why me!
RonanjRonan: We apologize for everything. We swear to compensate for the damaged caused today in the...
Headmistress: No, that does not matter anymore. More importantly, I sense a very delicious smell from you...
ElesisjElesis: !!!!!!
(Headmistress drains all players' MP)
JinjJin: Ugh!! T... the power inside me is!!!
Headmistress: Mmm! Tastes better than I expected. Excellent... Heh! Don't think that... any of you can get out of this place alive!! The debt will be paid by the lives of your own!!! Ahahahahahahaha!!!

Post Boss Battle

Headmistress: H... how is this possible...
ElesisjElesis: Now is the time to give up!
Headmistress: ... It won't... It won't end like this...

Boss (Hidden Form)

Post Boss Battle

Trivia

  • Chronologically speaking, this dungeon happens in a futuristic timeline far beyond that of any Hero Dungeon thus far, as Rin, Asin, and even Lime appear in this dungeon. It could otherwise be non-canon.
Dungeons of Grand Chase
Serdin
Trial Forest | Trial Tower | Outer Wall of Serdin | Kerrie Beach | Orc Temple | Gorgos' Dungeon
Kanavan
Elven Forest | Gorge of Oath | Marsh of Oblivion | Forsaken Barrows | Forgotten City | Gaikoz's Castle
Silver Land
The Whispering Woods | Ruins of the Silver Knights | Lake Aurora | King Guang's Fen | Primeval Island | King Fang's Lair | Victor's Fortress
Ellia
Partusay's Sea | Kamiki Castle | Temple of Fire | Hell Bridge | Kaze'aze's Castle | Kastulle Ruins Lower Floor | Kastulle Ruins Upper Floor | Battle for Bermesiah | Dimension's Door
Xenia
Xenia Border | Temple of Cuatal | Valstrath | The Wyrm's Maw | Altar of Judgement | Temple of Destruction | Forest of Life | Fortress of Ascension | Dimension's Door
Alcubra
Goblin Work Site | Underpass of Lost Hope | Kungji Village | Sands of Illusion | Deserted Town | Ra Canyon | Seth's Pyramid | Dimension's Door
Archimedia
Hammer's Reach | Under Hammer | Thunder Hammer | Relics of Kounat | Zeruel Border | Zeruel | Kounat's Collapse | Dimension's Door
île de Frost
Cursed Garden | Contaminated Basement | Spectral Corridor | Traitor's Art Room | Dark Library | Arachne's Nest
Trivia
Goliath Habitat | Ancient Golem Ruins | Shadow Forest | Lacerta Hunting Ground | Land of Despair | Dimension's End
Hero Dungeons
Sanctum of Destruction | The Crucible | Wizard's Labyrinth | Tower of Disappearance | Land of Judgment
Event Dungeons
Relay Dungeon | Nightmare Circus | Monster Train 301 | Hungry Pets' Revolt | Moonlight Village | Kounat Mental Collapse | Talin's Revenge | King Slime Land | Gorgos Queen's Nest | Illusions of Memory | Throne of the Goddess | Dimensional Chaser
Raid Dungeons
Berkas' Lair | Void (Invasion) | Void (Taint)
Advertisement