Ra Canyon Background
Ra Canyon (also known as The Gorge of Ra ) is the sixth dungeon of Alcubra .
Like the Desert Bandit's Village , Ra Canyon provides players with machines to aid them throughout the dungeon. In addition to bunkers, helicopters are provided and are necessary to cross the platform map. Like the bunkers, the Z attack of the helicopter rapidly fires bullets while the X attack has the player drop a grenade that inflicts high damage when it explodes, though it has a cooldown time. It is necessary to use the bunkers and helicopters in order to defeat the boss.
Upon arriving at the the canyon, the Grand Chase are attacked by hooded swordsmen, narrowly avoiding a falling boulder prior.Lire 's arrows to hit. Mari gives pursuit by mounting one of the helicopter devices despite Elesis 's reservations. The rest of the Chase follow suit.Carte , detects intruders, and Mari recklessly initiates the assault by dropping bombs from her flying mount. After a grueling battle, Carte is defeated and Ronan attempts to obtain information from him about the Kungji's treasure. However, Carte instead directs the Chase to Seth's Pyramid before fainting.
Normal (Level 80-82)
1
2
3
4
5
6
7
8
9
10
11
A
[[Image:m_ {{{A2}}}.PNG]]
[[Image:m_ {{{A3}}}.PNG]]
[[Image:m_ {{{A4}}}.PNG]]
[[Image:m_ {{{A5}}}.PNG]]
[[Image:m_ {{{A6}}}.PNG]]
[[Image:m_ {{{A7}}}.PNG]]
[[Image:m_ {{{A8}}}.PNG]]
[[Image:m_ {{{A9}}}.PNG]]
[[Image:m_ {{{A10}}}.PNG]]
[[Image:m_ {{{A11}}}.PNG]]
B
[[Image:m_ {{{B2}}}.PNG]]
[[Image:m_ {{{B3}}}.PNG]]
[[Image:m_ {{{B4}}}.PNG]]
[[Image:m_ {{{B5}}}.PNG]]
[[Image:m_ {{{B6}}}.PNG]]
[[Image:m_ {{{B7}}}.PNG]]
[[Image:m_ {{{B8}}}.PNG]]
[[Image:m_ {{{B9}}}.PNG]]
[[Image:m_ {{{B10}}}.PNG]]
[[Image:m_ {{{B11}}}.PNG]]
C
[[Image:m_ {{{C4}}}.PNG]]
[[Image:m_ {{{C5}}}.PNG]]
[[Image:m_ {{{C6}}}.PNG]]
[[Image:m_ {{{C7}}}.PNG]]
[[Image:m_ {{{C8}}}.PNG]]
[[Image:m_ {{{C9}}}.PNG]]
[[Image:m_ {{{C10}}}.PNG]]
[[Image:m_ {{{C11}}}.PNG]]
D
[[Image:m_ {{{D1}}}.PNG]]
[[Image:m_ {{{D2}}}.PNG]]
[[Image:m_ {{{D4}}}.PNG]]
[[Image:m_ {{{D5}}}.PNG]]
[[Image:m_ {{{D6}}}.PNG]]
[[Image:m_ {{{D7}}}.PNG]]
[[Image:m_ {{{D8}}}.PNG]]
[[Image:m_ {{{D9}}}.PNG]]
[[Image:m_ {{{D10}}}.PNG]]
[[Image:m_ {{{D11}}}.PNG]]
E
[[Image:m_ {{{E4}}}.PNG]]
[[Image:m_ {{{E5}}}.PNG]]
[[Image:m_ {{{E6}}}.PNG]]
[[Image:m_ {{{E7}}}.PNG]]
[[Image:m_ {{{E8}}}.PNG]]
[[Image:m_ {{{E9}}}.PNG]]
[[Image:m_ {{{E10}}}.PNG]]
[[Image:m_ {{{E11}}}.PNG]]
F
[[Image:m_ {{{F2}}}.PNG]]
[[Image:m_ {{{F3}}}.PNG]]
[[Image:m_ {{{F4}}}.PNG]]
[[Image:m_ {{{F5}}}.PNG]]
[[Image:m_ {{{F6}}}.PNG]]
[[Image:m_ {{{F7}}}.PNG]]
[[Image:m_ {{{F8}}}.PNG]]
[[Image:m_ {{{F9}}}.PNG]]
[[Image:m_ {{{F10}}}.PNG]]
[[Image:m_ {{{F11}}}.PNG]]
G
[[Image:m_ {{{G2}}}.PNG]]
[[Image:m_ {{{G3}}}.PNG]]
[[Image:m_ {{{G4}}}.PNG]]
[[Image:m_ {{{G5}}}.PNG]]
[[Image:m_ {{{G6}}}.PNG]]
[[Image:m_ {{{G7}}}.PNG]]
[[Image:m_ {{{G8}}}.PNG]]
[[Image:m_ {{{G9}}}.PNG]]
[[Image:m_ {{{G10}}}.PNG]]
[[Image:m_ {{{G11}}}.PNG]]
H
[[Image:m_ {{{H2}}}.PNG]]
[[Image:m_ {{{H3}}}.PNG]]
[[Image:m_ {{{H4}}}.PNG]]
[[Image:m_ {{{H5}}}.PNG]]
[[Image:m_ {{{H6}}}.PNG]]
[[Image:m_ {{{H7}}}.PNG]]
[[Image:m_ {{{H8}}}.PNG]]
[[Image:m_ {{{H9}}}.PNG]]
[[Image:m_ {{{H10}}}.PNG]]
[[Image:m_ {{{H11}}}.PNG]]
I
[[Image:m_ {{{I2}}}.PNG]]
[[Image:m_ {{{I3}}}.PNG]]
[[Image:m_ {{{I4}}}.PNG]]
[[Image:m_ {{{I5}}}.PNG]]
[[Image:m_ {{{I6}}}.PNG]]
[[Image:m_ {{{I7}}}.PNG]]
[[Image:m_ {{{I8}}}.PNG]]
[[Image:m_ {{{I9}}}.PNG]]
[[Image:m_ {{{I10}}}.PNG]]
[[Image:m_ {{{I11}}}.PNG]]
I
[[Image:m_ {{{J1}}}.PNG]]
[[Image:m_ {{{J2}}}.PNG]]
[[Image:m_ {{{J3}}}.PNG]]
[[Image:m_ {{{J4}}}.PNG]]
[[Image:m_ {{{J5}}}.PNG]]
[[Image:m_ {{{J6}}}.PNG]]
[[Image:m_ {{{J7}}}.PNG]]
[[Image:m_ {{{J8}}}.PNG]]
[[Image:m_ {{{J9}}}.PNG]]
[[Image:m_ {{{J10}}}.PNG]]
[[Image:m_ {{{J11}}}.PNG]]
I
[[Image:m_ {{{K1}}}.PNG]]
[[Image:m_ {{{K2}}}.PNG]]
[[Image:m_ {{{K3}}}.PNG]]
[[Image:m_ {{{K4}}}.PNG]]
[[Image:m_ {{{K5}}}.PNG]]
[[Image:m_ {{{K6}}}.PNG]]
[[Image:m_ {{{K7}}}.PNG]]
[[Image:m_ {{{K8}}}.PNG]]
[[Image:m_ {{{K9}}}.PNG]]
[[Image:m_ {{{K10}}}.PNG]]
[[Image:m_ {{{K11}}}.PNG]]
Hard (Level 81-83)
1
2
3
4
5
6
7
8
9
10
11
A
[[Image:m_ {{{A2}}}.PNG]]
[[Image:m_ {{{A3}}}.PNG]]
[[Image:m_ {{{A4}}}.PNG]]
[[Image:m_ {{{A5}}}.PNG]]
[[Image:m_ {{{A6}}}.PNG]]
[[Image:m_ {{{A7}}}.PNG]]
[[Image:m_ {{{A8}}}.PNG]]
[[Image:m_ {{{A9}}}.PNG]]
[[Image:m_ {{{A10}}}.PNG]]
[[Image:m_ {{{A11}}}.PNG]]
B
[[Image:m_ {{{B2}}}.PNG]]
[[Image:m_ {{{B3}}}.PNG]]
[[Image:m_ {{{B4}}}.PNG]]
[[Image:m_ {{{B5}}}.PNG]]
[[Image:m_ {{{B6}}}.PNG]]
[[Image:m_ {{{B7}}}.PNG]]
[[Image:m_ {{{B8}}}.PNG]]
[[Image:m_ {{{B9}}}.PNG]]
[[Image:m_ {{{B10}}}.PNG]]
[[Image:m_ {{{B11}}}.PNG]]
C
[[Image:m_ {{{C4}}}.PNG]]
[[Image:m_ {{{C5}}}.PNG]]
[[Image:m_ {{{C6}}}.PNG]]
[[Image:m_ {{{C7}}}.PNG]]
[[Image:m_ {{{C8}}}.PNG]]
[[Image:m_ {{{C9}}}.PNG]]
[[Image:m_ {{{C10}}}.PNG]]
[[Image:m_ {{{C11}}}.PNG]]
D
[[Image:m_ {{{D1}}}.PNG]]
[[Image:m_ {{{D2}}}.PNG]]
[[Image:m_ {{{D4}}}.PNG]]
[[Image:m_ {{{D5}}}.PNG]]
[[Image:m_ {{{D6}}}.PNG]]
[[Image:m_ {{{D7}}}.PNG]]
[[Image:m_ {{{D8}}}.PNG]]
[[Image:m_ {{{D9}}}.PNG]]
[[Image:m_ {{{D10}}}.PNG]]
[[Image:m_ {{{D11}}}.PNG]]
E
[[Image:m_ {{{E4}}}.PNG]]
[[Image:m_ {{{E5}}}.PNG]]
[[Image:m_ {{{E6}}}.PNG]]
[[Image:m_ {{{E7}}}.PNG]]
[[Image:m_ {{{E8}}}.PNG]]
[[Image:m_ {{{E9}}}.PNG]]
[[Image:m_ {{{E10}}}.PNG]]
[[Image:m_ {{{E11}}}.PNG]]
F
[[Image:m_ {{{F2}}}.PNG]]
[[Image:m_ {{{F3}}}.PNG]]
[[Image:m_ {{{F4}}}.PNG]]
[[Image:m_ {{{F5}}}.PNG]]
[[Image:m_ {{{F6}}}.PNG]]
[[Image:m_ {{{F7}}}.PNG]]
[[Image:m_ {{{F8}}}.PNG]]
[[Image:m_ {{{F9}}}.PNG]]
[[Image:m_ {{{F10}}}.PNG]]
[[Image:m_ {{{F11}}}.PNG]]
G
[[Image:m_ {{{G2}}}.PNG]]
[[Image:m_ {{{G3}}}.PNG]]
[[Image:m_ {{{G4}}}.PNG]]
[[Image:m_ {{{G5}}}.PNG]]
[[Image:m_ {{{G6}}}.PNG]]
[[Image:m_ {{{G7}}}.PNG]]
[[Image:m_ {{{G8}}}.PNG]]
[[Image:m_ {{{G9}}}.PNG]]
[[Image:m_ {{{G10}}}.PNG]]
[[Image:m_ {{{G11}}}.PNG]]
H
[[Image:m_ {{{H2}}}.PNG]]
[[Image:m_ {{{H3}}}.PNG]]
[[Image:m_ {{{H4}}}.PNG]]
[[Image:m_ {{{H5}}}.PNG]]
[[Image:m_ {{{H6}}}.PNG]]
[[Image:m_ {{{H7}}}.PNG]]
[[Image:m_ {{{H8}}}.PNG]]
[[Image:m_ {{{H9}}}.PNG]]
[[Image:m_ {{{H10}}}.PNG]]
[[Image:m_ {{{H11}}}.PNG]]
I
[[Image:m_ {{{I2}}}.PNG]]
[[Image:m_ {{{I3}}}.PNG]]
[[Image:m_ {{{I4}}}.PNG]]
[[Image:m_ {{{I5}}}.PNG]]
[[Image:m_ {{{I6}}}.PNG]]
[[Image:m_ {{{I7}}}.PNG]]
[[Image:m_ {{{I8}}}.PNG]]
[[Image:m_ {{{I9}}}.PNG]]
[[Image:m_ {{{I10}}}.PNG]]
[[Image:m_ {{{I11}}}.PNG]]
I
[[Image:m_ {{{J1}}}.PNG]]
[[Image:m_ {{{J2}}}.PNG]]
[[Image:m_ {{{J3}}}.PNG]]
[[Image:m_ {{{J4}}}.PNG]]
[[Image:m_ {{{J5}}}.PNG]]
[[Image:m_ {{{J6}}}.PNG]]
[[Image:m_ {{{J7}}}.PNG]]
[[Image:m_ {{{J8}}}.PNG]]
[[Image:m_ {{{J9}}}.PNG]]
[[Image:m_ {{{J10}}}.PNG]]
[[Image:m_ {{{J11}}}.PNG]]
I
[[Image:m_ {{{K1}}}.PNG]]
[[Image:m_ {{{K2}}}.PNG]]
[[Image:m_ {{{K3}}}.PNG]]
[[Image:m_ {{{K4}}}.PNG]]
[[Image:m_ {{{K5}}}.PNG]]
[[Image:m_ {{{K6}}}.PNG]]
[[Image:m_ {{{K7}}}.PNG]]
[[Image:m_ {{{K8}}}.PNG]]
[[Image:m_ {{{K9}}}.PNG]]
[[Image:m_ {{{K10}}}.PNG]]
[[Image:m_ {{{K11}}}.PNG]]
Very Hard (Level 82-84)
1
2
3
4
5
6
7
8
9
10
11
A
[[Image:m_ {{{A2}}}.PNG]]
[[Image:m_ {{{A3}}}.PNG]]
[[Image:m_ {{{A4}}}.PNG]]
[[Image:m_ {{{A5}}}.PNG]]
[[Image:m_ {{{A6}}}.PNG]]
[[Image:m_ {{{A7}}}.PNG]]
[[Image:m_ {{{A8}}}.PNG]]
[[Image:m_ {{{A9}}}.PNG]]
[[Image:m_ {{{A10}}}.PNG]]
[[Image:m_ {{{A11}}}.PNG]]
B
[[Image:m_ {{{B2}}}.PNG]]
[[Image:m_ {{{B3}}}.PNG]]
[[Image:m_ {{{B4}}}.PNG]]
[[Image:m_ {{{B5}}}.PNG]]
[[Image:m_ {{{B6}}}.PNG]]
[[Image:m_ {{{B7}}}.PNG]]
[[Image:m_ {{{B8}}}.PNG]]
[[Image:m_ {{{B9}}}.PNG]]
[[Image:m_ {{{B10}}}.PNG]]
[[Image:m_ {{{B11}}}.PNG]]
C
[[Image:m_ {{{C4}}}.PNG]]
[[Image:m_ {{{C5}}}.PNG]]
[[Image:m_ {{{C6}}}.PNG]]
[[Image:m_ {{{C7}}}.PNG]]
[[Image:m_ {{{C8}}}.PNG]]
[[Image:m_ {{{C9}}}.PNG]]
[[Image:m_ {{{C10}}}.PNG]]
[[Image:m_ {{{C11}}}.PNG]]
D
[[Image:m_ {{{D1}}}.PNG]]
[[Image:m_ {{{D2}}}.PNG]]
[[Image:m_ {{{D4}}}.PNG]]
[[Image:m_ {{{D5}}}.PNG]]
[[Image:m_ {{{D6}}}.PNG]]
[[Image:m_ {{{D7}}}.PNG]]
[[Image:m_ {{{D8}}}.PNG]]
[[Image:m_ {{{D9}}}.PNG]]
[[Image:m_ {{{D10}}}.PNG]]
[[Image:m_ {{{D11}}}.PNG]]
E
[[Image:m_ {{{E4}}}.PNG]]
[[Image:m_ {{{E5}}}.PNG]]
[[Image:m_ {{{E6}}}.PNG]]
[[Image:m_ {{{E7}}}.PNG]]
[[Image:m_ {{{E8}}}.PNG]]
[[Image:m_ {{{E9}}}.PNG]]
[[Image:m_ {{{E10}}}.PNG]]
[[Image:m_ {{{E11}}}.PNG]]
F
[[Image:m_ {{{F2}}}.PNG]]
[[Image:m_ {{{F3}}}.PNG]]
[[Image:m_ {{{F4}}}.PNG]]
[[Image:m_ {{{F5}}}.PNG]]
[[Image:m_ {{{F6}}}.PNG]]
[[Image:m_ {{{F7}}}.PNG]]
[[Image:m_ {{{F8}}}.PNG]]
[[Image:m_ {{{F9}}}.PNG]]
[[Image:m_ {{{F10}}}.PNG]]
[[Image:m_ {{{F11}}}.PNG]]
G
[[Image:m_ {{{G2}}}.PNG]]
[[Image:m_ {{{G3}}}.PNG]]
[[Image:m_ {{{G4}}}.PNG]]
[[Image:m_ {{{G5}}}.PNG]]
[[Image:m_ {{{G6}}}.PNG]]
[[Image:m_ {{{G7}}}.PNG]]
[[Image:m_ {{{G8}}}.PNG]]
[[Image:m_ {{{G9}}}.PNG]]
[[Image:m_ {{{G10}}}.PNG]]
[[Image:m_ {{{G11}}}.PNG]]
H
[[Image:m_ {{{H2}}}.PNG]]
[[Image:m_ {{{H3}}}.PNG]]
[[Image:m_ {{{H4}}}.PNG]]
[[Image:m_ {{{H5}}}.PNG]]
[[Image:m_ {{{H6}}}.PNG]]
[[Image:m_ {{{H7}}}.PNG]]
[[Image:m_ {{{H8}}}.PNG]]
[[Image:m_ {{{H9}}}.PNG]]
[[Image:m_ {{{H10}}}.PNG]]
[[Image:m_ {{{H11}}}.PNG]]
I
[[Image:m_ {{{I2}}}.PNG]]
[[Image:m_ {{{I3}}}.PNG]]
[[Image:m_ {{{I4}}}.PNG]]
[[Image:m_ {{{I5}}}.PNG]]
[[Image:m_ {{{I6}}}.PNG]]
[[Image:m_ {{{I7}}}.PNG]]
[[Image:m_ {{{I8}}}.PNG]]
[[Image:m_ {{{I9}}}.PNG]]
[[Image:m_ {{{I10}}}.PNG]]
[[Image:m_ {{{I11}}}.PNG]]
I
[[Image:m_ {{{J1}}}.PNG]]
[[Image:m_ {{{J2}}}.PNG]]
[[Image:m_ {{{J3}}}.PNG]]
[[Image:m_ {{{J4}}}.PNG]]
[[Image:m_ {{{J5}}}.PNG]]
[[Image:m_ {{{J6}}}.PNG]]
[[Image:m_ {{{J7}}}.PNG]]
[[Image:m_ {{{J8}}}.PNG]]
[[Image:m_ {{{J9}}}.PNG]]
[[Image:m_ {{{J10}}}.PNG]]
[[Image:m_ {{{J11}}}.PNG]]
I
[[Image:m_ {{{K1}}}.PNG]]
[[Image:m_ {{{K2}}}.PNG]]
[[Image:m_ {{{K3}}}.PNG]]
[[Image:m_ {{{K4}}}.PNG]]
[[Image:m_ {{{K5}}}.PNG]]
[[Image:m_ {{{K6}}}.PNG]]
[[Image:m_ {{{K7}}}.PNG]]
[[Image:m_ {{{K8}}}.PNG]]
[[Image:m_ {{{K9}}}.PNG]]
[[Image:m_ {{{K10}}}.PNG]]
[[Image:m_ {{{K11}}}.PNG]]
Champion (Level 83-85)
1
2
3
4
5
6
7
8
9
10
11
A
[[Image:m_ {{{A2}}}.PNG]]
[[Image:m_ {{{A3}}}.PNG]]
[[Image:m_ {{{A4}}}.PNG]]
[[Image:m_ {{{A5}}}.PNG]]
[[Image:m_ {{{A6}}}.PNG]]
[[Image:m_ {{{A7}}}.PNG]]
[[Image:m_ {{{A8}}}.PNG]]
[[Image:m_ {{{A9}}}.PNG]]
[[Image:m_ {{{A10}}}.PNG]]
[[Image:m_ {{{A11}}}.PNG]]
B
[[Image:m_ {{{B2}}}.PNG]]
[[Image:m_ {{{B3}}}.PNG]]
[[Image:m_ {{{B4}}}.PNG]]
[[Image:m_ {{{B5}}}.PNG]]
[[Image:m_ {{{B6}}}.PNG]]
[[Image:m_ {{{B7}}}.PNG]]
[[Image:m_ {{{B8}}}.PNG]]
[[Image:m_ {{{B9}}}.PNG]]
[[Image:m_ {{{B10}}}.PNG]]
[[Image:m_ {{{B11}}}.PNG]]
C
[[Image:m_ {{{C4}}}.PNG]]
[[Image:m_ {{{C5}}}.PNG]]
[[Image:m_ {{{C6}}}.PNG]]
[[Image:m_ {{{C7}}}.PNG]]
[[Image:m_ {{{C8}}}.PNG]]
[[Image:m_ {{{C9}}}.PNG]]
[[Image:m_ {{{C10}}}.PNG]]
[[Image:m_ {{{C11}}}.PNG]]
D
[[Image:m_ {{{D1}}}.PNG]]
[[Image:m_ {{{D2}}}.PNG]]
[[Image:m_ {{{D4}}}.PNG]]
[[Image:m_ {{{D5}}}.PNG]]
[[Image:m_ {{{D6}}}.PNG]]
[[Image:m_ {{{D7}}}.PNG]]
[[Image:m_ {{{D8}}}.PNG]]
[[Image:m_ {{{D9}}}.PNG]]
[[Image:m_ {{{D10}}}.PNG]]
[[Image:m_ {{{D11}}}.PNG]]
E
[[Image:m_ {{{E4}}}.PNG]]
[[Image:m_ {{{E5}}}.PNG]]
[[Image:m_ {{{E6}}}.PNG]]
[[Image:m_ {{{E7}}}.PNG]]
[[Image:m_ {{{E8}}}.PNG]]
[[Image:m_ {{{E9}}}.PNG]]
[[Image:m_ {{{E10}}}.PNG]]
[[Image:m_ {{{E11}}}.PNG]]
F
[[Image:m_ {{{F2}}}.PNG]]
[[Image:m_ {{{F3}}}.PNG]]
[[Image:m_ {{{F4}}}.PNG]]
[[Image:m_ {{{F5}}}.PNG]]
[[Image:m_ {{{F6}}}.PNG]]
[[Image:m_ {{{F7}}}.PNG]]
[[Image:m_ {{{F8}}}.PNG]]
[[Image:m_ {{{F9}}}.PNG]]
[[Image:m_ {{{F10}}}.PNG]]
[[Image:m_ {{{F11}}}.PNG]]
G
[[Image:m_ {{{G2}}}.PNG]]
[[Image:m_ {{{G3}}}.PNG]]
[[Image:m_ {{{G4}}}.PNG]]
[[Image:m_ {{{G5}}}.PNG]]
[[Image:m_ {{{G6}}}.PNG]]
[[Image:m_ {{{G7}}}.PNG]]
[[Image:m_ {{{G8}}}.PNG]]
[[Image:m_ {{{G9}}}.PNG]]
[[Image:m_ {{{G10}}}.PNG]]
[[Image:m_ {{{G11}}}.PNG]]
H
[[Image:m_ {{{H2}}}.PNG]]
[[Image:m_ {{{H3}}}.PNG]]
[[Image:m_ {{{H4}}}.PNG]]
[[Image:m_ {{{H5}}}.PNG]]
[[Image:m_ {{{H6}}}.PNG]]
[[Image:m_ {{{H7}}}.PNG]]
[[Image:m_ {{{H8}}}.PNG]]
[[Image:m_ {{{H9}}}.PNG]]
[[Image:m_ {{{H10}}}.PNG]]
[[Image:m_ {{{H11}}}.PNG]]
I
[[Image:m_ {{{I2}}}.PNG]]
[[Image:m_ {{{I3}}}.PNG]]
[[Image:m_ {{{I4}}}.PNG]]
[[Image:m_ {{{I5}}}.PNG]]
[[Image:m_ {{{I6}}}.PNG]]
[[Image:m_ {{{I7}}}.PNG]]
[[Image:m_ {{{I8}}}.PNG]]
[[Image:m_ {{{I9}}}.PNG]]
[[Image:m_ {{{I10}}}.PNG]]
[[Image:m_ {{{I11}}}.PNG]]
I
[[Image:m_ {{{J1}}}.PNG]]
[[Image:m_ {{{J2}}}.PNG]]
[[Image:m_ {{{J3}}}.PNG]]
[[Image:m_ {{{J4}}}.PNG]]
[[Image:m_ {{{J5}}}.PNG]]
[[Image:m_ {{{J6}}}.PNG]]
[[Image:m_ {{{J7}}}.PNG]]
[[Image:m_ {{{J8}}}.PNG]]
[[Image:m_ {{{J9}}}.PNG]]
[[Image:m_ {{{J10}}}.PNG]]
[[Image:m_ {{{J11}}}.PNG]]
I
[[Image:m_ {{{K1}}}.PNG]]
[[Image:m_ {{{K2}}}.PNG]]
[[Image:m_ {{{K3}}}.PNG]]
[[Image:m_ {{{K4}}}.PNG]]
[[Image:m_ {{{K5}}}.PNG]]
[[Image:m_ {{{K6}}}.PNG]]
[[Image:m_ {{{K7}}}.PNG]]
[[Image:m_ {{{K8}}}.PNG]]
[[Image:m_ {{{K9}}}.PNG]]
[[Image:m_ {{{K10}}}.PNG]]
[[Image:m_ {{{K11}}}.PNG]]
Monsters Dialogue Trivia As Mari appears in this dungeon as Geas , it can be assumed that the Alcubra dungeons take place after the events in Archimedia . However, this is in conflict with the dialogue in Goblin Work Site , as Jin claims there that they were supposed to head for Archimedia. In addition, Mari was supposed to have vanished after the events of Relics of Kounat .
This could otherwise be a design error.
The addition of the helicopters in this dungeon marks the first time the player is allowed to freely maneuver around the map and remain in the air for as long as they are riding the machine. 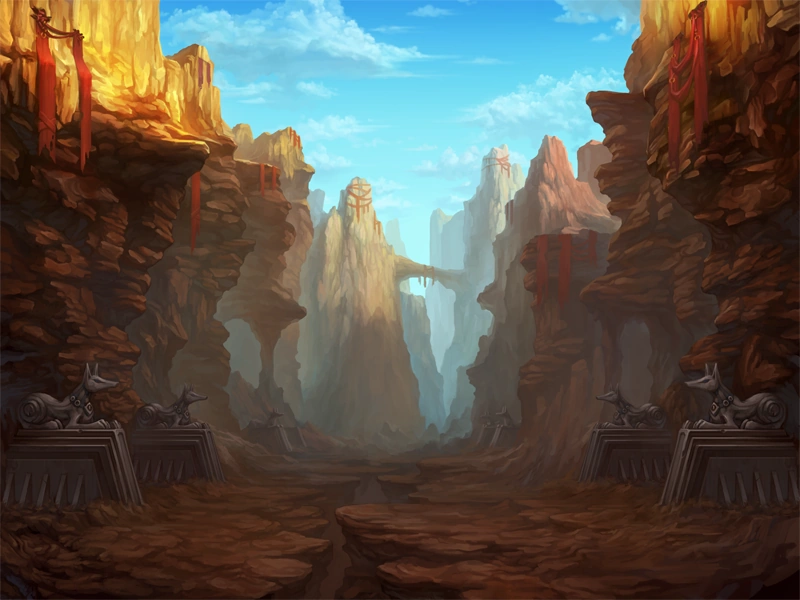

