Grand Chase Wiki
Advertisement
Valstrath
  • StarStar2Star2: Level 58-60
  • StarStarStar2: Level 59-61
  • StarStarStar: Level 60-62

Champ: Level 61-63

Sky93

Background of Valstrath

Valstrath (Mana Valley or Canyon of Disappearance) is the third dungeon of the Xenia Continent and the twenty-third dungeon in-game. It consists of a platform map which contains one "monster" that must be destroyed before the portals will open.

When the Chase reach Valstrath, they encounter strange stones that suck up all their mana. Sieghart appears out of the blue and warns them not to go near the stones, and then leaves shortly, giving Chase yet again.
Crossing through most monsters, they meet a humanoid creature named Ashtaroth, and by his intentions, serve the Ascendant God. He plays his own "game" with them, until he tires out and (aimlessly) casts Deep Impact at an infinite rate.
Before the Chase are sent to their doom, Vanessa pops in and uses her Soul Effect to knock off Ashtaroth's guard, preventing him from casting more meteors. She explains that Samsara sensed much danger ahead, and requested Vanessa to go support their new allies. The Chase thank her for the support, but the battle isn't over yet.
Ashtaroth starts questioning Vanessa why she would help them, and responds that the Chase's love is their protection, and she and Samsara have high hopes for them. She then states that he should be guarding the Fortress of Ascension, and not killing the Chase. Ashtaroth, annoyed of these words, summons Mynos, his pet to deal away with them.
After a second tiring battle, Ashtaroth seems upset that the force of Cycles left their side, and then vanishes. Vanessa explains that he was only being cautious, as he was intended to defend his master's fortress. The Chase ask that she were to join their cause, but refuses as it is forbidden for her faction to travel upon to another. They all part with their goodbyes.

Normal (Level 58-60)[]

1 2 3 4 5 6 7 8 9 10 11
A [[Image:m_ {{{A1}}}.PNG]] [[Image:m_ {{{A2}}}.PNG]] M room M harrow M start [[Image:m_ {{{A6}}}.PNG]] [[Image:m_ {{{A7}}}.PNG]] [[Image:m_ {{{A8}}}.PNG]] [[Image:m_ {{{A9}}}.PNG]] [[Image:m_ {{{A10}}}.PNG]] [[Image:m_ {{{A11}}}.PNG]]
B [[Image:m_ {{{B1}}}.PNG]] [[Image:m_ {{{B2}}}.PNG]] M varrow [[Image:m_ {{{B4}}}.PNG]] [[Image:m_ {{{B5}}}.PNG]] [[Image:m_ {{{B6}}}.PNG]] [[Image:m_ {{{B7}}}.PNG]] [[Image:m_ {{{B8}}}.PNG]] [[Image:m_ {{{B9}}}.PNG]] [[Image:m_ {{{B10}}}.PNG]] [[Image:m_ {{{B11}}}.PNG]]
C M room M harrow M room [[Image:m_ {{{C4}}}.PNG]] [[Image:m_ {{{C5}}}.PNG]] [[Image:m_ {{{C6}}}.PNG]] [[Image:m_ {{{C7}}}.PNG]] [[Image:m_ {{{C8}}}.PNG]] [[Image:m_ {{{C9}}}.PNG]] [[Image:m_ {{{C10}}}.PNG]] [[Image:m_ {{{C11}}}.PNG]]
D M varrow [[Image:m_ {{{D2}}}.PNG]] [[Image:m_ {{{D3}}}.PNG]] [[Image:m_ {{{D4}}}.PNG]] [[Image:m_ {{{D5}}}.PNG]] [[Image:m_ {{{D6}}}.PNG]] [[Image:m_ {{{D7}}}.PNG]] [[Image:m_ {{{D8}}}.PNG]] [[Image:m_ {{{D9}}}.PNG]] [[Image:m_ {{{D10}}}.PNG]] [[Image:m_ {{{D11}}}.PNG]]
E M room M harrow M boss [[Image:m_ {{{E4}}}.PNG]] [[Image:m_ {{{E5}}}.PNG]] [[Image:m_ {{{E6}}}.PNG]] [[Image:m_ {{{E7}}}.PNG]] [[Image:m_ {{{E8}}}.PNG]] [[Image:m_ {{{E9}}}.PNG]] [[Image:m_ {{{E10}}}.PNG]] [[Image:m_ {{{E11}}}.PNG]]
F [[Image:m_ {{{F1}}}.PNG]] [[Image:m_ {{{F2}}}.PNG]] [[Image:m_ {{{F3}}}.PNG]] [[Image:m_ {{{F4}}}.PNG]] [[Image:m_ {{{F5}}}.PNG]] [[Image:m_ {{{F6}}}.PNG]] [[Image:m_ {{{F7}}}.PNG]] [[Image:m_ {{{F8}}}.PNG]] [[Image:m_ {{{F9}}}.PNG]] [[Image:m_ {{{F10}}}.PNG]] [[Image:m_ {{{F11}}}.PNG]]
G [[Image:m_ {{{G1}}}.PNG]] [[Image:m_ {{{G2}}}.PNG]] [[Image:m_ {{{G3}}}.PNG]] [[Image:m_ {{{G4}}}.PNG]] [[Image:m_ {{{G5}}}.PNG]] [[Image:m_ {{{G6}}}.PNG]] [[Image:m_ {{{G7}}}.PNG]] [[Image:m_ {{{G8}}}.PNG]] [[Image:m_ {{{G9}}}.PNG]] [[Image:m_ {{{G10}}}.PNG]] [[Image:m_ {{{G11}}}.PNG]]
H [[Image:m_ {{{H1}}}.PNG]] [[Image:m_ {{{H2}}}.PNG]] [[Image:m_ {{{H3}}}.PNG]] [[Image:m_ {{{H4}}}.PNG]] [[Image:m_ {{{H5}}}.PNG]] [[Image:m_ {{{H6}}}.PNG]] [[Image:m_ {{{H7}}}.PNG]] [[Image:m_ {{{H8}}}.PNG]] [[Image:m_ {{{H9}}}.PNG]] [[Image:m_ {{{H10}}}.PNG]] [[Image:m_ {{{H11}}}.PNG]]
I [[Image:m_ {{{I1}}}.PNG]] [[Image:m_ {{{I2}}}.PNG]] [[Image:m_ {{{I3}}}.PNG]] [[Image:m_ {{{I4}}}.PNG]] [[Image:m_ {{{I5}}}.PNG]] [[Image:m_ {{{I6}}}.PNG]] [[Image:m_ {{{I7}}}.PNG]] [[Image:m_ {{{I8}}}.PNG]] [[Image:m_ {{{I9}}}.PNG]] [[Image:m_ {{{I10}}}.PNG]] [[Image:m_ {{{I11}}}.PNG]]
I [[Image:m_ {{{J1}}}.PNG]] [[Image:m_ {{{J2}}}.PNG]] [[Image:m_ {{{J3}}}.PNG]] [[Image:m_ {{{J4}}}.PNG]] [[Image:m_ {{{J5}}}.PNG]] [[Image:m_ {{{J6}}}.PNG]] [[Image:m_ {{{J7}}}.PNG]] [[Image:m_ {{{J8}}}.PNG]] [[Image:m_ {{{J9}}}.PNG]] [[Image:m_ {{{J10}}}.PNG]] [[Image:m_ {{{J11}}}.PNG]]
I [[Image:m_ {{{K1}}}.PNG]] [[Image:m_ {{{K2}}}.PNG]] [[Image:m_ {{{K3}}}.PNG]] [[Image:m_ {{{K4}}}.PNG]] [[Image:m_ {{{K5}}}.PNG]] [[Image:m_ {{{K6}}}.PNG]] [[Image:m_ {{{K7}}}.PNG]] [[Image:m_ {{{K8}}}.PNG]] [[Image:m_ {{{K9}}}.PNG]] [[Image:m_ {{{K10}}}.PNG]] [[Image:m_ {{{K11}}}.PNG]]

Hard (Level 59-61)[]

1 2 3 4 5 6 7 8 9 10 11
A [[Image:m_ {{{A1}}}.PNG]] [[Image:m_ {{{A2}}}.PNG]] M room M harrow M start [[Image:m_ {{{A6}}}.PNG]] [[Image:m_ {{{A7}}}.PNG]] [[Image:m_ {{{A8}}}.PNG]] [[Image:m_ {{{A9}}}.PNG]] [[Image:m_ {{{A10}}}.PNG]] [[Image:m_ {{{A11}}}.PNG]]
B [[Image:m_ {{{B1}}}.PNG]] [[Image:m_ {{{B2}}}.PNG]] M varrow [[Image:m_ {{{B4}}}.PNG]] [[Image:m_ {{{B5}}}.PNG]] [[Image:m_ {{{B6}}}.PNG]] [[Image:m_ {{{B7}}}.PNG]] [[Image:m_ {{{B8}}}.PNG]] [[Image:m_ {{{B9}}}.PNG]] [[Image:m_ {{{B10}}}.PNG]] [[Image:m_ {{{B11}}}.PNG]]
C M room M harrow M room M harrow M room [[Image:m_ {{{C6}}}.PNG]] [[Image:m_ {{{C7}}}.PNG]] [[Image:m_ {{{C8}}}.PNG]] [[Image:m_ {{{C9}}}.PNG]] [[Image:m_ {{{C10}}}.PNG]] [[Image:m_ {{{C11}}}.PNG]]
D M varrow [[Image:m_ {{{D2}}}.PNG]] [[Image:m_ {{{D3}}}.PNG]] [[Image:m_ {{{D4}}}.PNG]] [[Image:m_ {{{D5}}}.PNG]] [[Image:m_ {{{D6}}}.PNG]] [[Image:m_ {{{D7}}}.PNG]] [[Image:m_ {{{D8}}}.PNG]] [[Image:m_ {{{D9}}}.PNG]] [[Image:m_ {{{D10}}}.PNG]] [[Image:m_ {{{D11}}}.PNG]]
E M room M harrow M boss [[Image:m_ {{{E4}}}.PNG]] [[Image:m_ {{{E5}}}.PNG]] [[Image:m_ {{{E6}}}.PNG]] [[Image:m_ {{{E7}}}.PNG]] [[Image:m_ {{{E8}}}.PNG]] [[Image:m_ {{{E9}}}.PNG]] [[Image:m_ {{{E10}}}.PNG]] [[Image:m_ {{{E11}}}.PNG]]
F [[Image:m_ {{{F1}}}.PNG]] [[Image:m_ {{{F2}}}.PNG]] [[Image:m_ {{{F3}}}.PNG]] [[Image:m_ {{{F4}}}.PNG]] [[Image:m_ {{{F5}}}.PNG]] [[Image:m_ {{{F6}}}.PNG]] [[Image:m_ {{{F7}}}.PNG]] [[Image:m_ {{{F8}}}.PNG]] [[Image:m_ {{{F9}}}.PNG]] [[Image:m_ {{{F10}}}.PNG]] [[Image:m_ {{{F11}}}.PNG]]
G [[Image:m_ {{{G1}}}.PNG]] [[Image:m_ {{{G2}}}.PNG]] [[Image:m_ {{{G3}}}.PNG]] [[Image:m_ {{{G4}}}.PNG]] [[Image:m_ {{{G5}}}.PNG]] [[Image:m_ {{{G6}}}.PNG]] [[Image:m_ {{{G7}}}.PNG]] [[Image:m_ {{{G8}}}.PNG]] [[Image:m_ {{{G9}}}.PNG]] [[Image:m_ {{{G10}}}.PNG]] [[Image:m_ {{{G11}}}.PNG]]
H [[Image:m_ {{{H1}}}.PNG]] [[Image:m_ {{{H2}}}.PNG]] [[Image:m_ {{{H3}}}.PNG]] [[Image:m_ {{{H4}}}.PNG]] [[Image:m_ {{{H5}}}.PNG]] [[Image:m_ {{{H6}}}.PNG]] [[Image:m_ {{{H7}}}.PNG]] [[Image:m_ {{{H8}}}.PNG]] [[Image:m_ {{{H9}}}.PNG]] [[Image:m_ {{{H10}}}.PNG]] [[Image:m_ {{{H11}}}.PNG]]
I [[Image:m_ {{{I1}}}.PNG]] [[Image:m_ {{{I2}}}.PNG]] [[Image:m_ {{{I3}}}.PNG]] [[Image:m_ {{{I4}}}.PNG]] [[Image:m_ {{{I5}}}.PNG]] [[Image:m_ {{{I6}}}.PNG]] [[Image:m_ {{{I7}}}.PNG]] [[Image:m_ {{{I8}}}.PNG]] [[Image:m_ {{{I9}}}.PNG]] [[Image:m_ {{{I10}}}.PNG]] [[Image:m_ {{{I11}}}.PNG]]
I [[Image:m_ {{{J1}}}.PNG]] [[Image:m_ {{{J2}}}.PNG]] [[Image:m_ {{{J3}}}.PNG]] [[Image:m_ {{{J4}}}.PNG]] [[Image:m_ {{{J5}}}.PNG]] [[Image:m_ {{{J6}}}.PNG]] [[Image:m_ {{{J7}}}.PNG]] [[Image:m_ {{{J8}}}.PNG]] [[Image:m_ {{{J9}}}.PNG]] [[Image:m_ {{{J10}}}.PNG]] [[Image:m_ {{{J11}}}.PNG]]
I [[Image:m_ {{{K1}}}.PNG]] [[Image:m_ {{{K2}}}.PNG]] [[Image:m_ {{{K3}}}.PNG]] [[Image:m_ {{{K4}}}.PNG]] [[Image:m_ {{{K5}}}.PNG]] [[Image:m_ {{{K6}}}.PNG]] [[Image:m_ {{{K7}}}.PNG]] [[Image:m_ {{{K8}}}.PNG]] [[Image:m_ {{{K9}}}.PNG]] [[Image:m_ {{{K10}}}.PNG]] [[Image:m_ {{{K11}}}.PNG]]

Very Hard (Level 60-62)[]

1 2 3 4 5 6 7 8 9 10 11
A M room [[Image:m_ {{{A2}}}.PNG]] M room M harrow M start [[Image:m_ {{{A6}}}.PNG]] [[Image:m_ {{{A7}}}.PNG]] [[Image:m_ {{{A8}}}.PNG]] [[Image:m_ {{{A9}}}.PNG]] [[Image:m_ {{{A10}}}.PNG]] [[Image:m_ {{{A11}}}.PNG]]
B M varrow [[Image:m_ {{{B2}}}.PNG]] M varrow [[Image:m_ {{{B4}}}.PNG]] [[Image:m_ {{{B5}}}.PNG]] [[Image:m_ {{{B6}}}.PNG]] [[Image:m_ {{{B7}}}.PNG]] [[Image:m_ {{{B8}}}.PNG]] [[Image:m_ {{{B9}}}.PNG]] [[Image:m_ {{{B10}}}.PNG]] [[Image:m_ {{{B11}}}.PNG]]
C M room M harrow M room M harrow M room [[Image:m_ {{{C6}}}.PNG]] [[Image:m_ {{{C7}}}.PNG]] [[Image:m_ {{{C8}}}.PNG]] [[Image:m_ {{{C9}}}.PNG]] [[Image:m_ {{{C10}}}.PNG]] [[Image:m_ {{{C11}}}.PNG]]
D M varrow [[Image:m_ {{{D2}}}.PNG]] [[Image:m_ {{{D3}}}.PNG]] [[Image:m_ {{{D4}}}.PNG]] [[Image:m_ {{{D5}}}.PNG]] [[Image:m_ {{{D6}}}.PNG]] [[Image:m_ {{{D7}}}.PNG]] [[Image:m_ {{{D8}}}.PNG]] [[Image:m_ {{{D9}}}.PNG]] [[Image:m_ {{{D10}}}.PNG]] [[Image:m_ {{{D11}}}.PNG]]
E M room M harrow M boss [[Image:m_ {{{E4}}}.PNG]] [[Image:m_ {{{E5}}}.PNG]] [[Image:m_ {{{E6}}}.PNG]] [[Image:m_ {{{E7}}}.PNG]] [[Image:m_ {{{E8}}}.PNG]] [[Image:m_ {{{E9}}}.PNG]] [[Image:m_ {{{E10}}}.PNG]] [[Image:m_ {{{E11}}}.PNG]]
F [[Image:m_ {{{F1}}}.PNG]] [[Image:m_ {{{F2}}}.PNG]] [[Image:m_ {{{F3}}}.PNG]] [[Image:m_ {{{F4}}}.PNG]] [[Image:m_ {{{F5}}}.PNG]] [[Image:m_ {{{F6}}}.PNG]] [[Image:m_ {{{F7}}}.PNG]] [[Image:m_ {{{F8}}}.PNG]] [[Image:m_ {{{F9}}}.PNG]] [[Image:m_ {{{F10}}}.PNG]] [[Image:m_ {{{F11}}}.PNG]]
G [[Image:m_ {{{G1}}}.PNG]] [[Image:m_ {{{G2}}}.PNG]] [[Image:m_ {{{G3}}}.PNG]] [[Image:m_ {{{G4}}}.PNG]] [[Image:m_ {{{G5}}}.PNG]] [[Image:m_ {{{G6}}}.PNG]] [[Image:m_ {{{G7}}}.PNG]] [[Image:m_ {{{G8}}}.PNG]] [[Image:m_ {{{G9}}}.PNG]] [[Image:m_ {{{G10}}}.PNG]] [[Image:m_ {{{G11}}}.PNG]]
H [[Image:m_ {{{H1}}}.PNG]] [[Image:m_ {{{H2}}}.PNG]] [[Image:m_ {{{H3}}}.PNG]] [[Image:m_ {{{H4}}}.PNG]] [[Image:m_ {{{H5}}}.PNG]] [[Image:m_ {{{H6}}}.PNG]] [[Image:m_ {{{H7}}}.PNG]] [[Image:m_ {{{H8}}}.PNG]] [[Image:m_ {{{H9}}}.PNG]] [[Image:m_ {{{H10}}}.PNG]] [[Image:m_ {{{H11}}}.PNG]]
I [[Image:m_ {{{I1}}}.PNG]] [[Image:m_ {{{I2}}}.PNG]] [[Image:m_ {{{I3}}}.PNG]] [[Image:m_ {{{I4}}}.PNG]] [[Image:m_ {{{I5}}}.PNG]] [[Image:m_ {{{I6}}}.PNG]] [[Image:m_ {{{I7}}}.PNG]] [[Image:m_ {{{I8}}}.PNG]] [[Image:m_ {{{I9}}}.PNG]] [[Image:m_ {{{I10}}}.PNG]] [[Image:m_ {{{I11}}}.PNG]]
I [[Image:m_ {{{J1}}}.PNG]] [[Image:m_ {{{J2}}}.PNG]] [[Image:m_ {{{J3}}}.PNG]] [[Image:m_ {{{J4}}}.PNG]] [[Image:m_ {{{J5}}}.PNG]] [[Image:m_ {{{J6}}}.PNG]] [[Image:m_ {{{J7}}}.PNG]] [[Image:m_ {{{J8}}}.PNG]] [[Image:m_ {{{J9}}}.PNG]] [[Image:m_ {{{J10}}}.PNG]] [[Image:m_ {{{J11}}}.PNG]]
I [[Image:m_ {{{K1}}}.PNG]] [[Image:m_ {{{K2}}}.PNG]] [[Image:m_ {{{K3}}}.PNG]] [[Image:m_ {{{K4}}}.PNG]] [[Image:m_ {{{K5}}}.PNG]] [[Image:m_ {{{K6}}}.PNG]] [[Image:m_ {{{K7}}}.PNG]] [[Image:m_ {{{K8}}}.PNG]] [[Image:m_ {{{K9}}}.PNG]] [[Image:m_ {{{K10}}}.PNG]] [[Image:m_ {{{K11}}}.PNG]]

Champion (Level 61-63)[]

1 2 3 4 5 6 7 8 9 10 11
A [[Image:m_ {{{A1}}}.PNG]] [[Image:m_ {{{A2}}}.PNG]] M room M harrow M start [[Image:m_ {{{A6}}}.PNG]] [[Image:m_ {{{A7}}}.PNG]] [[Image:m_ {{{A8}}}.PNG]] [[Image:m_ {{{A9}}}.PNG]] [[Image:m_ {{{A10}}}.PNG]] [[Image:m_ {{{A11}}}.PNG]]
B [[Image:m_ {{{B1}}}.PNG]] [[Image:m_ {{{B2}}}.PNG]] M varrow [[Image:m_ {{{B4}}}.PNG]] [[Image:m_ {{{B5}}}.PNG]] [[Image:m_ {{{B6}}}.PNG]] [[Image:m_ {{{B7}}}.PNG]] [[Image:m_ {{{B8}}}.PNG]] [[Image:m_ {{{B9}}}.PNG]] [[Image:m_ {{{B10}}}.PNG]] [[Image:m_ {{{B11}}}.PNG]]
C M room M harrow M room [[Image:m_ {{{C4}}}.PNG]] [[Image:m_ {{{C5}}}.PNG]] [[Image:m_ {{{C6}}}.PNG]] [[Image:m_ {{{C7}}}.PNG]] [[Image:m_ {{{C8}}}.PNG]] [[Image:m_ {{{C9}}}.PNG]] [[Image:m_ {{{C10}}}.PNG]] [[Image:m_ {{{C11}}}.PNG]]
D M varrow [[Image:m_ {{{D2}}}.PNG]] [[Image:m_ {{{D3}}}.PNG]] [[Image:m_ {{{D4}}}.PNG]] [[Image:m_ {{{D5}}}.PNG]] [[Image:m_ {{{D6}}}.PNG]] [[Image:m_ {{{D7}}}.PNG]] [[Image:m_ {{{D8}}}.PNG]] [[Image:m_ {{{D9}}}.PNG]] [[Image:m_ {{{D10}}}.PNG]] [[Image:m_ {{{D11}}}.PNG]]
E M room M harrow M boss [[Image:m_ {{{E4}}}.PNG]] [[Image:m_ {{{E5}}}.PNG]] [[Image:m_ {{{E6}}}.PNG]] [[Image:m_ {{{E7}}}.PNG]] [[Image:m_ {{{E8}}}.PNG]] [[Image:m_ {{{E9}}}.PNG]] [[Image:m_ {{{E10}}}.PNG]] [[Image:m_ {{{E11}}}.PNG]]
F [[Image:m_ {{{F1}}}.PNG]] [[Image:m_ {{{F2}}}.PNG]] [[Image:m_ {{{F3}}}.PNG]] [[Image:m_ {{{F4}}}.PNG]] [[Image:m_ {{{F5}}}.PNG]] [[Image:m_ {{{F6}}}.PNG]] [[Image:m_ {{{F7}}}.PNG]] [[Image:m_ {{{F8}}}.PNG]] [[Image:m_ {{{F9}}}.PNG]] [[Image:m_ {{{F10}}}.PNG]] [[Image:m_ {{{F11}}}.PNG]]
G [[Image:m_ {{{G1}}}.PNG]] [[Image:m_ {{{G2}}}.PNG]] [[Image:m_ {{{G3}}}.PNG]] [[Image:m_ {{{G4}}}.PNG]] [[Image:m_ {{{G5}}}.PNG]] [[Image:m_ {{{G6}}}.PNG]] [[Image:m_ {{{G7}}}.PNG]] [[Image:m_ {{{G8}}}.PNG]] [[Image:m_ {{{G9}}}.PNG]] [[Image:m_ {{{G10}}}.PNG]] [[Image:m_ {{{G11}}}.PNG]]
H [[Image:m_ {{{H1}}}.PNG]] [[Image:m_ {{{H2}}}.PNG]] [[Image:m_ {{{H3}}}.PNG]] [[Image:m_ {{{H4}}}.PNG]] [[Image:m_ {{{H5}}}.PNG]] [[Image:m_ {{{H6}}}.PNG]] [[Image:m_ {{{H7}}}.PNG]] [[Image:m_ {{{H8}}}.PNG]] [[Image:m_ {{{H9}}}.PNG]] [[Image:m_ {{{H10}}}.PNG]] [[Image:m_ {{{H11}}}.PNG]]
I [[Image:m_ {{{I1}}}.PNG]] [[Image:m_ {{{I2}}}.PNG]] [[Image:m_ {{{I3}}}.PNG]] [[Image:m_ {{{I4}}}.PNG]] [[Image:m_ {{{I5}}}.PNG]] [[Image:m_ {{{I6}}}.PNG]] [[Image:m_ {{{I7}}}.PNG]] [[Image:m_ {{{I8}}}.PNG]] [[Image:m_ {{{I9}}}.PNG]] [[Image:m_ {{{I10}}}.PNG]] [[Image:m_ {{{I11}}}.PNG]]
I [[Image:m_ {{{J1}}}.PNG]] [[Image:m_ {{{J2}}}.PNG]] [[Image:m_ {{{J3}}}.PNG]] [[Image:m_ {{{J4}}}.PNG]] [[Image:m_ {{{J5}}}.PNG]] [[Image:m_ {{{J6}}}.PNG]] [[Image:m_ {{{J7}}}.PNG]] [[Image:m_ {{{J8}}}.PNG]] [[Image:m_ {{{J9}}}.PNG]] [[Image:m_ {{{J10}}}.PNG]] [[Image:m_ {{{J11}}}.PNG]]
I [[Image:m_ {{{K1}}}.PNG]] [[Image:m_ {{{K2}}}.PNG]] [[Image:m_ {{{K3}}}.PNG]] [[Image:m_ {{{K4}}}.PNG]] [[Image:m_ {{{K5}}}.PNG]] [[Image:m_ {{{K6}}}.PNG]] [[Image:m_ {{{K7}}}.PNG]] [[Image:m_ {{{K8}}}.PNG]] [[Image:m_ {{{K9}}}.PNG]] [[Image:m_ {{{K10}}}.PNG]] [[Image:m_ {{{K11}}}.PNG]]

Monsters[]

Dialogue[]

Beginning[]

Elesisj
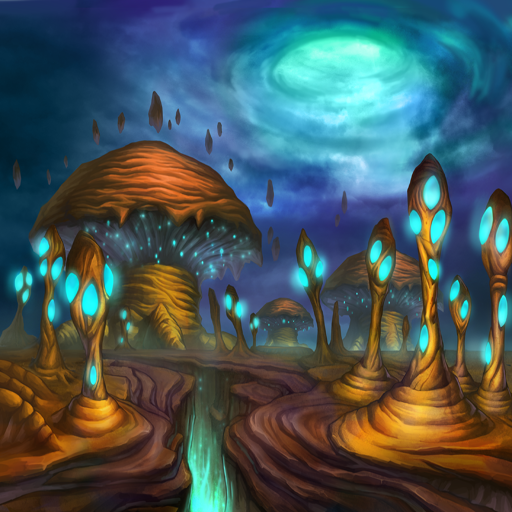
Elesis: This place is pretty strange. What are those stones giving off that blue light?
SieghartjSieghart: Ah, I wouldn't go near those if I were you. They'll suck the energy out of you.
ArmejArme: Why, it's Sieghart!
ElesisjElesis: Stop it. Sieghart my ...Look, here! How dare you go around using Sieghart's name! You want to get hurt or something?
SieghartjSieghart: ...Ha~ap!
ElesisjElesis: *Gasp* How could this be? Those sword skills are known only to Sieghart.
SieghartjSieghart: Oh ho! I see you recognize my moves. Then you're definitely a descendent of mine. You are Elscud's daughter, aren't you?
ElesisjElesis: How do you know about my father? What do you know about him? Tell me now!
LassjLass: Don't get yourself worked up. We'll catch him and make him talk. Ha~ap!
SieghartjSieghart: Ho! Aiya~ap!
LassjLass: This can't be! There's no way a human can move this fast!
SieghartjSieghart: Don't get so excited. And you, Red. Aren't you using a Sieghart family skill? And I can't believe you're getting so worked up over your old man.
ElesisjElesis: You don't know me! Die!
SieghartjSieghart: Hmm! Kuuurrrk! Ha~ap!
ElesisjElesis: Hoo...hoo...
SieghartjSieghart: Now, now, we're not going to get anywhere at this rate. Maybe next time.
ElesisjElesis: Wait!
SieghartjSieghart: Until next time!
ElesisjElesis: ...
JinjJin: What are you waiting for? Let's follow him!

Mini Boss[]

ElesisjElesis: I think this about does it.
LirejLire: Are you okay? This seems to be taking a lot out of you.
LassjLass: I can understand, but try to calm down. You've been very excitable for awhile.
Ashtaroth: So you've finally arrived, Grand Chase. I have been expecting you.
(The screen suddenly sidescrolls to the right, revealing a man)
LassjLass: !!!
ElesisjElesis: Who are you?!
Ashtaroth: My name is Ashtaroth, guardian to the Ascendant God.
RyanjRyan: The Ascendant God? Then, you're here to attack us?
Ashtaroth: That's right. Your obnoxious behavior is quite displeasing to the Ascendant God. I have been sent to pass judgment on you in his stead.
ElesisjElesis: We don't have much time so bring it on!
RonanjRonan: Elesis, please be careful. He's giving off some immense power.
Ashtaroth: Heh heh. You will now know the fear of death.
LassjLass: Get ready!

Post Mini Boss Battle[]

(Ashtaroth is floating in midair as he taunts the Chase)
Ashtaroth: Psh! Not bad, Grand Chase. But play time is over. I will end your lives now!
(Ashtaroth summons meteors out of nowhere which constantly impact the field)
ElesisjElesis: Ack! Wha-What's this?!
ArmejArme: He's using such strong magic! Shields are useless!
LassjLass: Ronan! Do something! If this goes on, we'll be completely destroyed!
Ashtaroth: This is the power of ascendancy! The power of the true ruler of all the gods!
AmyjAmy: Kyaaaak!
Vanessa: Ha~~~~ap!
(Vanessa appears behind the group and casts Soul Effect, which impacts Ashtaroth. The meteors no longer impact the field)
Ashtaroth: What! Vanessa! Do not interfere. Why are you here?
Vanessa: I have been charged with protecting these brave souls.
Ashtaroth: Tch! This fight was nearly over...
(Ashtaroth disappears)
RonanjRonan: Thank you, Vanessa. We were able to stay alive because of you.
ElesisjElesis: But Vanessa, why are you here?
Vanessa: Samsara sensed sinister energies at work, so he sent me to make sure you were safe.
LirejLire: Samsara is truly an amazing being.
Vanessa: But, the fight is not yet over. We will discuss this at a later time.

Boss[]

Ashtaroth: Vanessa, how can you and Samsara have any faith in these pitiful creatures? Their strength is nothing next to the power of the Ascendant God!
Vanessa: I know better than anyone else that if they combine their strengths there is nothing they cannot overcome. I fight to protect and support them. They are strong together. As their numbers grow, so does their power. The hopes of all the world rest upon the shoulders of these brave knights. This is why Samsara and I have high expectations of them.
Ashtaroth: Do you really believe an army of ants could take down a dragon? If you hadn't shown up, they would already be dead. What makes you think they can take on even greater challenges?
Vanessa: The fact that you are here trying to kill them when you should be guarding the Fortress of Ascension is your answer. What they are lacking in strength for now, I shall make up for them.
Ashtaroth: So, it looks like you'll continue to be a nuisance then. Vanessa, I shall send you and these so called "knights" straight to hell together!
(Ashtaroth performs a hand motion, which summons a fearsome dragon)
ElesisjElesis: Ack! What is that thing?
RonanjRonan: Looks like Astharoth summoned it. This is not looking to be an easy fight.
Ashtaroth: Go, my slave! Trample down upon those insects!
Mynos: Rawr!!!
LassjLass: Everyone, get ready!

Post Boss Battle[]

LassjLass: Ha...haaa...Did we kill it?
RonanjRonan: Whew! That was a hard fight.
ElesisjElesis: It's your turn now, Ashtaroth!
Ashtaroth: (Does this mean they've defeated us? It is still very impressive, even if they had Vanessa's help. I mustn't be caught off guard.)
Vanessa: Ha ha ha...did you see, Ashtaroth? What you just witnessed was the strength of those fighting to protect what they love!
Ashtaroth: Vanessa, you look exhausted.
ArmejArme: Well then, you must be spent, too. There's no way one could use all that magic and be fine.
Ashtaroth: Yes, I am a bit weary. Little girl mage, I shall be retiring back to the temple now.
ElesisjElesis: Do you think we're just going to let you go like that? Come down here and fight!
Ashtaroth: Such high spirits. If Vanessa hadn't arrived you all would've surely been obliterated. Vanessa, it is regrettable that you have left our control and became our enemy. In some ways, you were more difficult to handle than Samsara himself.
Vanessa: ...
Ashtaroth: But I shall withdraw for now. There is no point in wasting my full power on you. But mark my words, I will be watching you. We'll see how long these children will last without you. Hahahahahaha!
(Ashtaroth disappears yet again)
AmyjAmy: Tch~ He's totally looking down on us! I'm so mad!
Vanessa: It's not that. He's being very cautious. You can tell by the fact he came all the way out here when he should be guarding the Fortress of Ascension.
RonanjRonan: In any case, we are able to survive because of you, Vanessa. Thank you very much.
ArmejArme: So will you be joining us on our journey, Vanessa? It would be very reassuring.
Vanessa: No. I can only be of assistance up to this point. Beyond this place I would be entering the territories of other gods, and I am forbidden from doing so. However, I am confident that you can overcome all obstacles even without me here. Continue to love, help, and become one heart and mind together, and nobody can stand against you.
ElesisjElesis: Just one question though. Asides from us, have you seen any other outsiders traveling through Xenia?
Vanessa: Outsiders. I'm not sure. Oh, I did spot someone, but he was so quick I couldn't chase him. But a mysterious figure has been traveling in and out of Xenia for some time now. Hm, he was carrying a large sword and had long black hair, but as I said before, he was so quick I can't be certain of where he went.
ElesisjElesis: I see. Oh, Vanessa, does this mean you'll be returning to the Temple of Cuatal now?
Vanessa: That's right. I cannot go beyond this area. Beyond those ravines lie the realm of other gods, and I cannot go there. So, I'll be on my way back. May the gods' divine protection be with you...

Dungeons of Grand Chase
Serdin
Trial Forest | Trial Tower | Outer Wall of Serdin | Kerrie Beach | Orc Temple | Gorgos' Dungeon
Kanavan
Elven Forest | Gorge of Oath | Marsh of Oblivion | Forsaken Barrows | Forgotten City | Gaikoz's Castle
Silver Land
The Whispering Woods | Ruins of the Silver Knights | Lake Aurora | King Guang's Fen | Primeval Island | King Fang's Lair | Victor's Fortress
Ellia
Partusay's Sea | Kamiki Castle | Temple of Fire | Hell Bridge | Kaze'aze's Castle | Kastulle Ruins Lower Floor | Kastulle Ruins Upper Floor | Battle for Bermesiah | Dimension's Door
Xenia
Xenia Border | Temple of Cuatal | Valstrath | The Wyrm's Maw | Altar of Judgement | Temple of Destruction | Forest of Life | Fortress of Ascension | Dimension's Door
Alcubra
Goblin Work Site | Underpass of Lost Hope | Kungji Village | Sands of Illusion | Deserted Town | Ra Canyon | Seth's Pyramid | Dimension's Door
Archimedia
Hammer's Reach | Under Hammer | Thunder Hammer | Relics of Kounat | Zeruel Border | Zeruel | Kounat's Collapse | Dimension's Door
île de Frost
Cursed Garden | Contaminated Basement | Spectral Corridor | Traitor's Art Room | Dark Library | Arachne's Nest
Trivia
Goliath Habitat | Ancient Golem Ruins | Shadow Forest | Lacerta Hunting Ground | Land of Despair | Dimension's End
Hero Dungeons
Sanctum of Destruction | The Crucible | Wizard's Labyrinth | Tower of Disappearance | Land of Judgment
Event Dungeons
Relay Dungeon | Nightmare Circus | Monster Train 301 | Hungry Pets' Revolt | Moonlight Village | Kounat Mental Collapse | Talin's Revenge | King Slime Land | Gorgos Queen's Nest | Illusions of Memory | Throne of the Goddess | Dimensional Chaser
Raid Dungeons
Berkas' Lair | Void (Invasion) | Void (Taint)
Advertisement