(→Trivia) |
No edit summary |
||
| Line 1: | Line 1: | ||
{{Xenia Border}} |
{{Xenia Border}} |
||
Xenia Border is the twenty-first dungeon in the game, and is the first in the [[Xenia]] Continent. This dungeon is the only one to have two main bosses on separate paths, but players only need to defeat one boss to complete each dungeon run. Each of the paths has a mini-boss, which is a weaker version of the main boss and cannot summon monsters. Xenia Border is also where players must go to collect items for the [[Worn-out Amy Mission]], having to visit both bosses numerous times. |
Xenia Border is the twenty-first dungeon in the game, and is the first in the [[Xenia]] Continent. This dungeon is the only one to have two main bosses on separate paths, but players only need to defeat one boss to complete each dungeon run. Each of the paths has a mini-boss, which is a weaker version of the main boss and cannot summon monsters. Xenia Border is also where players must go to collect items for the [[Worn-out Amy Mission]], having to visit both bosses numerous times. |
||
| + | |||
| + | Sieghart appears here and (finally) officially joins the Chase. |
||
| + | |||
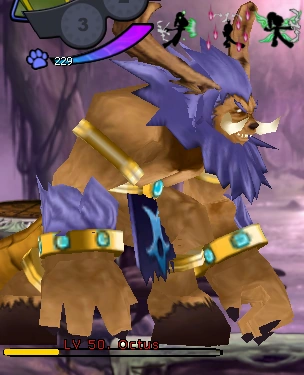
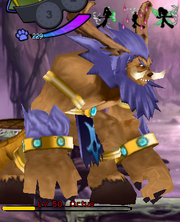
[[Image:Octus.png|thumb|right|One of the two bosses of Xenia Border, Octus]] |
[[Image:Octus.png|thumb|right|One of the two bosses of Xenia Border, Octus]] |
||
Revision as of 19:59, 30 April 2010


 : Level 54-56
- : Level 55-57
- : Level 56-58
![]() : Level 57-59
Xenia Border is the twenty-first dungeon in the game, and is the first in the Xenia Continent. This dungeon is the only one to have two main bosses on separate paths, but players only need to defeat one boss to complete each dungeon run. Each of the paths has a mini-boss, which is a weaker version of the main boss and cannot summon monsters. Xenia Border is also where players must go to collect items for the Worn-out Amy Mission, having to visit both bosses numerous times.
: Level 57-59
Xenia Border is the twenty-first dungeon in the game, and is the first in the Xenia Continent. This dungeon is the only one to have two main bosses on separate paths, but players only need to defeat one boss to complete each dungeon run. Each of the paths has a mini-boss, which is a weaker version of the main boss and cannot summon monsters. Xenia Border is also where players must go to collect items for the Worn-out Amy Mission, having to visit both bosses numerous times.
Sieghart appears here and (finally) officially joins the Chase.
One of the two bosses of Xenia Border, Octus
One Star (Level 46-48)
| 1 | 7 | ||||||||||
|---|---|---|---|---|---|---|---|---|---|---|---|
| A | 
|
||||||||||
| G |
|
||||||||||

|
|||||||||||
Two Star (Level 47-49)
| 1 | 7 | ||||||||||
|---|---|---|---|---|---|---|---|---|---|---|---|
| A |
|
||||||||||
| G |
|
||||||||||
|
|
|||||||||||
Three Star (Level 48-50)
| 1 | 7 | 8 | 9 | ||||||||
|---|---|---|---|---|---|---|---|---|---|---|---|
| A |
|
||||||||||
| E | |||||||||||
| F | |||||||||||
| G |
|
||||||||||
|
|
|||||||||||
Champion Mode (Level 51-53)
| 1 | 7 | ||||||||||
|---|---|---|---|---|---|---|---|---|---|---|---|
| A |
|
||||||||||
| G |
|
||||||||||
|
|
|||||||||||
Monsters
- Native Spearman
- Native Leader
- Carnivorous Plant Jr.
- Beholder
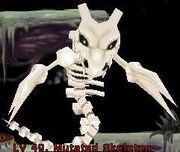
- Mutated Skeleton
- Moss Monster
- Octus (Boss)
- Lenasian (Boss)

A Mutated Skeleton
Item Drops
- Refined Topaz
- Refined Ruby
- Refined Sapphire
- Aging Core
- Grand Chase Helm
- Grand Chase Upper Armor
- Grand Chase Lower Armor
- Grand Chase Gloves
- Grand Chase Shoes
- Grand Chase Cloak
- Grand Chase Weapon
- Wild Force Tail (Boss only)
- Wild Force Shield (Boss only)
- Book: Honor Rune-Helm (Boss only)
- Book: Honor Rune-Armor (Boss only)
- Book: Honor Rune-Weapon (Boss only)
- Book: Old Honor Rune-Helm (Boss only)
- Book: Old Honor Rune-Armor (Boss only)
- Book: Old Honor Rune-Weapon (Boss only)
- Crystal (Boss only)
Trivia
- It would appear as if Lenasian and Octus are siblings, as they have a similar appearance.
- This is the only dungeon that has two bosses, each on sepreate paths.
- The Wild Force accessories may have been based on these bosses.