Grand Chase Wiki
No edit summary
No edit summary
 
(10 intermediate revisions by 4 users not shown)
Line 1: Line 1:
 
{{Template:Zeruel Border}}
 
{{Template:Zeruel Border}}
   
  +
[[File:Img1_2.jpg|thumb|300px]]
[[File:Img1_2.jpg|thumb|300px]][[File:BG_Karuel_Border_(1).jpg|thumb|300px|Karuel Border Background]][[File:BG_Karuel_Border_(2).jpg|thumb|300px|Karuel Border Background]]
+
[[File:BG_Karuel_Border_(1).jpg|thumb|300px|Zeruel Border Background]][[File:BG_Karuel_Border_(2).jpg|thumb|300px|Zeruel Border Background]]
   
'''Zeruel Border''' is the fifth dungeon in [[Archimedia]]. This location is the entrance to the dark elf domain, [[Zeruel]] .
+
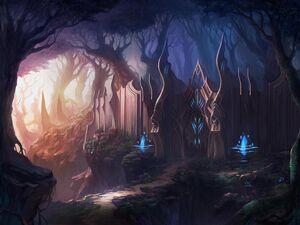
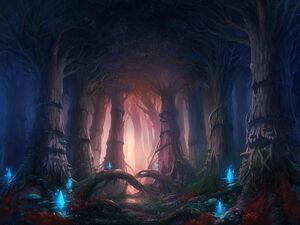
'''Zeruel Border''', also known as '''Karuel Border''', is the fifth dungeon in [[Archimedia]]. This location is the entrance to the dark elf domain, [[Zeruel]].
 
After assisting [[Dio]] in closing the [[Dimensional Portal]]s and recruiting the demon into their ranks, the Chase continue in their pursuit of [[Ashtaroth]]. They end up deep within a beautiful but eerie forest, and are soon ambushed by dark elven troops.<br />
 
Along the way, the Chase stumbles upon a secret passageway. [[Ryan]] advises them to quickly vacate the area to avoid traps, though [[Amy]] hints at a valuable treasure hidden there.<br />
 
Special Force Leader [[Dahlia]], like [[Talin Elfbane]], is highly suspicious of the Chase and accuses them of teaming up with the dwarves. She engages them in an incredibly long battle, using four different attack forms, but is eventually defeated. Upon her loss, Dalia laughs and reveals that she was merely a diversion and that Ashtaroth had already begun to move, then teleports away. [[Sieghart]] has an ominous feeling, and the Chase quickly head for Zeruel.


==Normal (Level 78-80)==
 
==Normal (Level 78-80)==
Line 63: Line 60:
   
 
==Monsters==
 
==Monsters==
*[[Darkelf Assassin]]
+
*[[Dark Elven Scout]]
*[[Darkelf Archer]]
+
*[[Dark Elven Assassin]]
  +
*[[Dark Elven Magic Archer]]
*[[Darkelf Scout]]
 
*[[Darkelf Cavalry]]
+
*[[Guard Tower]]
  +
*[[Dark Elven Rider]]
 
*[[Dahlia]] (Boss)
 
*[[Dahlia]] (Boss)
  +
  +
==Story==
 
After assisting [[Dio]] in closing the [[Dimensional Portal]]s and recruiting the demon into their ranks, the Chase continue in their pursuit of [[Ashtaroth]]. They end up deep within a beautiful but eerie forest, and are soon ambushed by dark elven troops.
  +
 
Along the way, the Chase stumbles upon a secret passageway. [[Ryan]] advises them to quickly vacate the area to avoid traps, though [[Amy]] hints at a valuable treasure hidden there.
  +
 
Moving further into the forest, Special Force Leader [[Dahlia]], like [[Talin Elfbane]], is highly suspicious of the Chase and accuses them of teaming up with the dwarves. She engages them in an incredibly long battle, using four different attack forms, but is eventually defeated. Upon her loss, Dalia laughs and reveals that she was merely a diversion and that Baldinar had already begun to move, then teleports away. [[Sieghart]] has an ominous feeling, and the Chase quickly head for Zeruel.
  +
   
 
==Dialogue==
 
==Dialogue==
 
===Beginning===
 
===Beginning===
{{Lired}} I think we entered deep enough... I can't seem to find the end of this place.<br />
+
{{Lired}} This forest is so thick. Feels like there's no end.<br />
{{Sieghartd}} A beautiful forest... but there is something eerie about it. It's like something's going to happen at any moment.<br />
+
{{Sieghartd}} It's a beautiful forest, but at the same time, it's kind of spooky. I feel like something's about to happen.<br />
'''Special Force Leader [[Dahlia]]:''' Intruders! Archer squad, open fire!<br />
+
'''[[File:Daliahj.png]]Special Force Leader [[Dahlia]]:''' Enemies! Archers!<br />
{{Sieghartd}} ... So it seems that the omen always comes to reality.<br />
+
{{Sieghartd}} ...Seems like bad feelings always come true.<br />
{{Elesisd}} Tsk... a sudden attack. That's just cowardly!
+
{{Elesisd}} We're under fire!
   
 
===Jumping Map===
 
===Jumping Map===
{{Amyd}} Hey, where is this place?<br />
+
{{Amyd}} Ack!<br />
{{Ryand}} Looks like some sort of secret passage. We'd better get out of here quickly considering that there may be some dangerous traps around.<br />
+
{{Ryand}} It looks like we're in a secret passageway. We don't know if there's anything dangerous in here, so let's get out quickly.<br />
{{Amyd}} Hmm... It's like there is some kind of valuable treasure hidden around here.
+
{{Amyd}} But, I feel like there must be some great treasure hidden here.
   
 
===Boss (Claw Mode)===
 
===Boss (Claw Mode)===
'''Special Force Leader Dahlia:''' Halt! And I thought it was a bit strange that the [[Dimensional Portal]] had opened...<br />
+
'''[[File:Daliahj.png]]Special Force Leader Dahlia:''' Stop right there! I thought the opening of the portals was strange enough…<br />
'''Special Force Leader Dahlia:''' So those moronic Dwarves have teamed up with humans to fight back against the Demons.<br />
+
'''[[File:Daliahj.png]]Special Force Leader Dahlia:''' I see that these stupid dwarves are working with humans to bring the Demons into this world.<br />
{{Ronand}} It's a misunderstanding. We only came here to find the causes behind that event.<br />
+
{{Ronand}} No, you've got it all wrong. We've also come here to find out what's going on.<br />
'''Special Force Leader Dahlia:''' Hmph! I will not be beguiled by those lies. Attack the humans!<br />
+
'''[[File:Daliahj.png]]Special Force Leader Dahlia:''' I will not fall for your lies. Attack the humans!<br />
{{Elesisd}} Sigh... Why do they never listen to what we say?
+
{{Elesisd}} Haaaaa…why won't she believe us?
   
 
===Boss (Dagger Mode)===
 
===Boss (Dagger Mode)===
'''Special Force Leader Dahlia:''' Impressive. But you won't be able to fare against my daggers!
+
'''[[File:Daliahj.png]]Special Force Leader Dahlia:''' Impressive. However, you won't stop our daggers!
   
 
===Boss (Bow Mode)===
 
===Boss (Bow Mode)===
'''Special Force Leader Dahlia:''' Try surviving against by bow!
+
'''[[File:Daliahj.png]]Special Force Leader Dahlia:''' You won't escape our arrows!
   
 
===Boss (Cavalier Mode)===
 
===Boss (Cavalier Mode)===
'''Special Force Leader Dahlia:''' Haap! You will never be able to dodge my spear.
+
'''[[File:Daliahj.png]]Special Force Leader Dahlia:''' Ha ap~! You won't evade my spear!
   
 
===Post Boss Battle===
 
===Post Boss Battle===
'''Special Force Leader Dahlia:''' Ugh!<br />
+
'''[[File:Daliahj.png]]Special Force Leader Dahlia:''' Keuk!<br />
{{Lired}} This is enough... Any more battles are meaningless.<br />
+
{{Lired}} Please, stop. All this fighting is just meaningless!<br />
'''Special Force Leader Dahlia:''' Kahahaha! Magnificent, Grand Chase... But it is too late now. Lord [[Baldinar]] has started to make his move.<br />
+
'''[[File:Daliahj.png]]Special Force Leader Dahlia:''' Hahahaha! Impressive, Grand Chase. But, it's already too late. [[Bardinar]] is already on the move.<br />
{{Sieghartd}} Baldinar! How the hell do you know him?<br />
+
{{Sieghartd}} Bardinar! How do you know him?<br />
'''Special Force Leader Dahlia:''' How you say...? I guess I have diverted you long enough. Now if you will excuse me... Bye!<br />
+
'''[[File:Daliahj.png]]Special Force Leader Dahlia:''' I'll never tell. In any case, I've wasted enough of your time, and I have other matters to take care of.<br />
 
{{Sieghartd}} Wait!<br />
 
{{Sieghartd}} Wait!<br />
 
(Dahlia teleports away)<br />
 
(Dahlia teleports away)<br />
{{Sieghartd}} Karuel... I have a bad feeling about this.<br />
+
{{Sieghartd}} [[Zeruel]]…I have a bad feeling about this.<br />
 
{{Lired}} Let's hurry!
 
{{Lired}} Let's hurry!
  +
==Trivia==
  +
*Zeruel Border is the second dungeon, the first being [[Moonlight Village]], to introduce an entry hazard. Purple arrows will rain down on the player during the cutscene and deal damage, though this can be avoided if the cutscene is skipped and players jump out of the way in time.
  +
*On Very Hard difficulty and above, all Zeruel Border monsters gain additional properties to their attacks that inflict the Bleed and Poison ailments and will incur a huge amount of damage over time if the player is afflicted.
   
{{Stub}}
 
 
{{Dungeons}}
 
{{Dungeons}}
 
[[Category:Dungeons]]
 
[[Category:Dungeons]]

Latest revision as of 00:01, 18 May 2013

Zerul Border
  • StarStar2Star2: Level 78-80
  • StarStarStar2: Level 79-81
  • StarStarStar: Level 80-82

Champ: Level 81-83

Img1 2
BG Karuel Border (1)

Zeruel Border Background

BG Karuel Border (2)

Zeruel Border Background

Zeruel Border, also known as Karuel Border, is the fifth dungeon in Archimedia. This location is the entrance to the dark elf domain, Zeruel.

Normal (Level 78-80)

1 2 3 4 5 6 7 8 9 10 11
A M start M rarrow M room M rarrow M room [[Image:m_ {{{A6}}}.PNG]] [[Image:m_ {{{A7}}}.PNG]] [[Image:m_ {{{A8}}}.PNG]] [[Image:m_ {{{A9}}}.PNG]] [[Image:m_ {{{A10}}}.PNG]] [[Image:m_ {{{A11}}}.PNG]]
B [[Image:m_ {{{B1}}}.PNG]] [[Image:m_ {{{B2}}}.PNG]] [[Image:m_ {{{B3}}}.PNG]] [[Image:m_ {{{B4}}}.PNG]] M darrow [[Image:m_ {{{B6}}}.PNG]] [[Image:m_ {{{B7}}}.PNG]] [[Image:m_ {{{B8}}}.PNG]] [[Image:m_ {{{B9}}}.PNG]] [[Image:m_ {{{B10}}}.PNG]] [[Image:m_ {{{B11}}}.PNG]]
C [[Image:m_ {{{C1}}}.PNG]] [[Image:m_ {{{C2}}}.PNG]] [[Image:m_ {{{C3}}}.PNG]] [[Image:m_ {{{C4}}}.PNG]] M room M rarrow M room M rarrow M boss [[Image:m_ {{{C10}}}.PNG]] [[Image:m_ {{{C11}}}.PNG]]
D [[Image:m_ {{{D1}}}.PNG]] [[Image:m_ {{{D2}}}.PNG]] [[Image:m_ {{{D3}}}.PNG]] [[Image:m_ {{{D4}}}.PNG]] [[Image:m_ {{{D5}}}.PNG]] [[Image:m_ {{{D6}}}.PNG]] [[Image:m_ {{{D7}}}.PNG]] [[Image:m_ {{{D8}}}.PNG]] [[Image:m_ {{{D9}}}.PNG]] [[Image:m_ {{{D10}}}.PNG]] [[Image:m_ {{{D11}}}.PNG]]
E [[Image:m_ {{{E1}}}.PNG]] [[Image:m_ {{{E2}}}.PNG]] [[Image:m_ {{{E3}}}.PNG]] [[Image:m_ {{{E4}}}.PNG]] [[Image:m_ {{{E5}}}.PNG]] [[Image:m_ {{{E6}}}.PNG]] [[Image:m_ {{{E7}}}.PNG]] [[Image:m_ {{{E8}}}.PNG]] [[Image:m_ {{{E9}}}.PNG]] [[Image:m_ {{{E10}}}.PNG]] [[Image:m_ {{{E11}}}.PNG]]
F [[Image:m_ {{{F1}}}.PNG]] [[Image:m_ {{{F2}}}.PNG]] [[Image:m_ {{{F3}}}.PNG]] [[Image:m_ {{{F4}}}.PNG]] [[Image:m_ {{{F5}}}.PNG]] [[Image:m_ {{{F6}}}.PNG]] [[Image:m_ {{{F7}}}.PNG]] [[Image:m_ {{{F8}}}.PNG]] [[Image:m_ {{{F9}}}.PNG]] [[Image:m_ {{{F10}}}.PNG]] [[Image:m_ {{{F11}}}.PNG]]
G [[Image:m_ {{{G1}}}.PNG]] [[Image:m_ {{{G2}}}.PNG]] [[Image:m_ {{{G3}}}.PNG]] [[Image:m_ {{{G4}}}.PNG]] [[Image:m_ {{{G5}}}.PNG]] [[Image:m_ {{{G6}}}.PNG]] [[Image:m_ {{{G7}}}.PNG]] [[Image:m_ {{{G8}}}.PNG]] [[Image:m_ {{{G9}}}.PNG]] [[Image:m_ {{{G10}}}.PNG]] [[Image:m_ {{{G11}}}.PNG]]
H [[Image:m_ {{{H1}}}.PNG]] [[Image:m_ {{{H2}}}.PNG]] [[Image:m_ {{{H3}}}.PNG]] [[Image:m_ {{{H4}}}.PNG]] [[Image:m_ {{{H5}}}.PNG]] [[Image:m_ {{{H6}}}.PNG]] [[Image:m_ {{{H7}}}.PNG]] [[Image:m_ {{{H8}}}.PNG]] [[Image:m_ {{{H9}}}.PNG]] [[Image:m_ {{{H10}}}.PNG]] [[Image:m_ {{{H11}}}.PNG]]
I [[Image:m_ {{{I1}}}.PNG]] [[Image:m_ {{{I2}}}.PNG]] [[Image:m_ {{{I3}}}.PNG]] [[Image:m_ {{{I4}}}.PNG]] [[Image:m_ {{{I5}}}.PNG]] [[Image:m_ {{{I6}}}.PNG]] [[Image:m_ {{{I7}}}.PNG]] [[Image:m_ {{{I8}}}.PNG]] [[Image:m_ {{{I9}}}.PNG]] [[Image:m_ {{{I10}}}.PNG]] [[Image:m_ {{{I11}}}.PNG]]
I [[Image:m_ {{{J1}}}.PNG]] [[Image:m_ {{{J2}}}.PNG]] [[Image:m_ {{{J3}}}.PNG]] [[Image:m_ {{{J4}}}.PNG]] [[Image:m_ {{{J5}}}.PNG]] [[Image:m_ {{{J6}}}.PNG]] [[Image:m_ {{{J7}}}.PNG]] [[Image:m_ {{{J8}}}.PNG]] [[Image:m_ {{{J9}}}.PNG]] [[Image:m_ {{{J10}}}.PNG]] [[Image:m_ {{{J11}}}.PNG]]
I [[Image:m_ {{{K1}}}.PNG]] [[Image:m_ {{{K2}}}.PNG]] [[Image:m_ {{{K3}}}.PNG]] [[Image:m_ {{{K4}}}.PNG]] [[Image:m_ {{{K5}}}.PNG]] [[Image:m_ {{{K6}}}.PNG]] [[Image:m_ {{{K7}}}.PNG]] [[Image:m_ {{{K8}}}.PNG]] [[Image:m_ {{{K9}}}.PNG]] [[Image:m_ {{{K10}}}.PNG]] [[Image:m_ {{{K11}}}.PNG]]

Hard (Level 79-81)

1 2 3 4 5 6 7 8 9 10 11
A M start M rarrow M room M rarrow M room [[Image:m_ {{{A6}}}.PNG]] [[Image:m_ {{{A7}}}.PNG]] [[Image:m_ {{{A8}}}.PNG]] [[Image:m_ {{{A9}}}.PNG]] [[Image:m_ {{{A10}}}.PNG]] [[Image:m_ {{{A11}}}.PNG]]
B [[Image:m_ {{{B1}}}.PNG]] [[Image:m_ {{{B2}}}.PNG]] [[Image:m_ {{{B3}}}.PNG]] [[Image:m_ {{{B4}}}.PNG]] M darrow [[Image:m_ {{{B6}}}.PNG]] [[Image:m_ {{{B7}}}.PNG]] [[Image:m_ {{{B8}}}.PNG]] [[Image:m_ {{{B9}}}.PNG]] [[Image:m_ {{{B10}}}.PNG]] [[Image:m_ {{{B11}}}.PNG]]
C [[Image:m_ {{{C1}}}.PNG]] [[Image:m_ {{{C2}}}.PNG]] [[Image:m_ {{{C3}}}.PNG]] [[Image:m_ {{{C4}}}.PNG]] M room M rarrow M room M rarrow M boss [[Image:m_ {{{C10}}}.PNG]] [[Image:m_ {{{C11}}}.PNG]]
D [[Image:m_ {{{D1}}}.PNG]] [[Image:m_ {{{D2}}}.PNG]] [[Image:m_ {{{D3}}}.PNG]] [[Image:m_ {{{D4}}}.PNG]] [[Image:m_ {{{D5}}}.PNG]] [[Image:m_ {{{D6}}}.PNG]] [[Image:m_ {{{D7}}}.PNG]] [[Image:m_ {{{D8}}}.PNG]] [[Image:m_ {{{D9}}}.PNG]] [[Image:m_ {{{D10}}}.PNG]] [[Image:m_ {{{D11}}}.PNG]]
E [[Image:m_ {{{E1}}}.PNG]] [[Image:m_ {{{E2}}}.PNG]] [[Image:m_ {{{E3}}}.PNG]] [[Image:m_ {{{E4}}}.PNG]] [[Image:m_ {{{E5}}}.PNG]] [[Image:m_ {{{E6}}}.PNG]] [[Image:m_ {{{E7}}}.PNG]] [[Image:m_ {{{E8}}}.PNG]] [[Image:m_ {{{E9}}}.PNG]] [[Image:m_ {{{E10}}}.PNG]] [[Image:m_ {{{E11}}}.PNG]]
F [[Image:m_ {{{F1}}}.PNG]] [[Image:m_ {{{F2}}}.PNG]] [[Image:m_ {{{F3}}}.PNG]] [[Image:m_ {{{F4}}}.PNG]] [[Image:m_ {{{F5}}}.PNG]] [[Image:m_ {{{F6}}}.PNG]] [[Image:m_ {{{F7}}}.PNG]] [[Image:m_ {{{F8}}}.PNG]] [[Image:m_ {{{F9}}}.PNG]] [[Image:m_ {{{F10}}}.PNG]] [[Image:m_ {{{F11}}}.PNG]]
G [[Image:m_ {{{G1}}}.PNG]] [[Image:m_ {{{G2}}}.PNG]] [[Image:m_ {{{G3}}}.PNG]] [[Image:m_ {{{G4}}}.PNG]] [[Image:m_ {{{G5}}}.PNG]] [[Image:m_ {{{G6}}}.PNG]] [[Image:m_ {{{G7}}}.PNG]] [[Image:m_ {{{G8}}}.PNG]] [[Image:m_ {{{G9}}}.PNG]] [[Image:m_ {{{G10}}}.PNG]] [[Image:m_ {{{G11}}}.PNG]]
H [[Image:m_ {{{H1}}}.PNG]] [[Image:m_ {{{H2}}}.PNG]] [[Image:m_ {{{H3}}}.PNG]] [[Image:m_ {{{H4}}}.PNG]] [[Image:m_ {{{H5}}}.PNG]] [[Image:m_ {{{H6}}}.PNG]] [[Image:m_ {{{H7}}}.PNG]] [[Image:m_ {{{H8}}}.PNG]] [[Image:m_ {{{H9}}}.PNG]] [[Image:m_ {{{H10}}}.PNG]] [[Image:m_ {{{H11}}}.PNG]]
I [[Image:m_ {{{I1}}}.PNG]] [[Image:m_ {{{I2}}}.PNG]] [[Image:m_ {{{I3}}}.PNG]] [[Image:m_ {{{I4}}}.PNG]] [[Image:m_ {{{I5}}}.PNG]] [[Image:m_ {{{I6}}}.PNG]] [[Image:m_ {{{I7}}}.PNG]] [[Image:m_ {{{I8}}}.PNG]] [[Image:m_ {{{I9}}}.PNG]] [[Image:m_ {{{I10}}}.PNG]] [[Image:m_ {{{I11}}}.PNG]]
I [[Image:m_ {{{J1}}}.PNG]] [[Image:m_ {{{J2}}}.PNG]] [[Image:m_ {{{J3}}}.PNG]] [[Image:m_ {{{J4}}}.PNG]] [[Image:m_ {{{J5}}}.PNG]] [[Image:m_ {{{J6}}}.PNG]] [[Image:m_ {{{J7}}}.PNG]] [[Image:m_ {{{J8}}}.PNG]] [[Image:m_ {{{J9}}}.PNG]] [[Image:m_ {{{J10}}}.PNG]] [[Image:m_ {{{J11}}}.PNG]]
I [[Image:m_ {{{K1}}}.PNG]] [[Image:m_ {{{K2}}}.PNG]] [[Image:m_ {{{K3}}}.PNG]] [[Image:m_ {{{K4}}}.PNG]] [[Image:m_ {{{K5}}}.PNG]] [[Image:m_ {{{K6}}}.PNG]] [[Image:m_ {{{K7}}}.PNG]] [[Image:m_ {{{K8}}}.PNG]] [[Image:m_ {{{K9}}}.PNG]] [[Image:m_ {{{K10}}}.PNG]] [[Image:m_ {{{K11}}}.PNG]]

Very Hard (Level 80-82)

1 2 3 4 5 6 7 8 9 10 11
A M start M rarrow M room M rarrow M room [[Image:m_ {{{A6}}}.PNG]] [[Image:m_ {{{A7}}}.PNG]] [[Image:m_ {{{A8}}}.PNG]] [[Image:m_ {{{A9}}}.PNG]] [[Image:m_ {{{A10}}}.PNG]] [[Image:m_ {{{A11}}}.PNG]]
B [[Image:m_ {{{B1}}}.PNG]] [[Image:m_ {{{B2}}}.PNG]] [[Image:m_ {{{B3}}}.PNG]] [[Image:m_ {{{B4}}}.PNG]] M darrow [[Image:m_ {{{B6}}}.PNG]] [[Image:m_ {{{B7}}}.PNG]] [[Image:m_ {{{B8}}}.PNG]] [[Image:m_ {{{B9}}}.PNG]] [[Image:m_ {{{B10}}}.PNG]] [[Image:m_ {{{B11}}}.PNG]]
C [[Image:m_ {{{C1}}}.PNG]] [[Image:m_ {{{C2}}}.PNG]] [[Image:m_ {{{C3}}}.PNG]] [[Image:m_ {{{C4}}}.PNG]] M room M rarrow M room M rarrow M boss [[Image:m_ {{{C10}}}.PNG]] [[Image:m_ {{{C11}}}.PNG]]
D [[Image:m_ {{{D1}}}.PNG]] [[Image:m_ {{{D2}}}.PNG]] [[Image:m_ {{{D3}}}.PNG]] [[Image:m_ {{{D4}}}.PNG]] [[Image:m_ {{{D5}}}.PNG]] [[Image:m_ {{{D6}}}.PNG]] [[Image:m_ {{{D7}}}.PNG]] [[Image:m_ {{{D8}}}.PNG]] [[Image:m_ {{{D9}}}.PNG]] [[Image:m_ {{{D10}}}.PNG]] [[Image:m_ {{{D11}}}.PNG]]
E [[Image:m_ {{{E1}}}.PNG]] [[Image:m_ {{{E2}}}.PNG]] [[Image:m_ {{{E3}}}.PNG]] [[Image:m_ {{{E4}}}.PNG]] [[Image:m_ {{{E5}}}.PNG]] [[Image:m_ {{{E6}}}.PNG]] [[Image:m_ {{{E7}}}.PNG]] [[Image:m_ {{{E8}}}.PNG]] [[Image:m_ {{{E9}}}.PNG]] [[Image:m_ {{{E10}}}.PNG]] [[Image:m_ {{{E11}}}.PNG]]
F [[Image:m_ {{{F1}}}.PNG]] [[Image:m_ {{{F2}}}.PNG]] [[Image:m_ {{{F3}}}.PNG]] [[Image:m_ {{{F4}}}.PNG]] [[Image:m_ {{{F5}}}.PNG]] [[Image:m_ {{{F6}}}.PNG]] [[Image:m_ {{{F7}}}.PNG]] [[Image:m_ {{{F8}}}.PNG]] [[Image:m_ {{{F9}}}.PNG]] [[Image:m_ {{{F10}}}.PNG]] [[Image:m_ {{{F11}}}.PNG]]
G [[Image:m_ {{{G1}}}.PNG]] [[Image:m_ {{{G2}}}.PNG]] [[Image:m_ {{{G3}}}.PNG]] [[Image:m_ {{{G4}}}.PNG]] [[Image:m_ {{{G5}}}.PNG]] [[Image:m_ {{{G6}}}.PNG]] [[Image:m_ {{{G7}}}.PNG]] [[Image:m_ {{{G8}}}.PNG]] [[Image:m_ {{{G9}}}.PNG]] [[Image:m_ {{{G10}}}.PNG]] [[Image:m_ {{{G11}}}.PNG]]
H [[Image:m_ {{{H1}}}.PNG]] [[Image:m_ {{{H2}}}.PNG]] [[Image:m_ {{{H3}}}.PNG]] [[Image:m_ {{{H4}}}.PNG]] [[Image:m_ {{{H5}}}.PNG]] [[Image:m_ {{{H6}}}.PNG]] [[Image:m_ {{{H7}}}.PNG]] [[Image:m_ {{{H8}}}.PNG]] [[Image:m_ {{{H9}}}.PNG]] [[Image:m_ {{{H10}}}.PNG]] [[Image:m_ {{{H11}}}.PNG]]
I [[Image:m_ {{{I1}}}.PNG]] [[Image:m_ {{{I2}}}.PNG]] [[Image:m_ {{{I3}}}.PNG]] [[Image:m_ {{{I4}}}.PNG]] [[Image:m_ {{{I5}}}.PNG]] [[Image:m_ {{{I6}}}.PNG]] [[Image:m_ {{{I7}}}.PNG]] [[Image:m_ {{{I8}}}.PNG]] [[Image:m_ {{{I9}}}.PNG]] [[Image:m_ {{{I10}}}.PNG]] [[Image:m_ {{{I11}}}.PNG]]
I [[Image:m_ {{{J1}}}.PNG]] [[Image:m_ {{{J2}}}.PNG]] [[Image:m_ {{{J3}}}.PNG]] [[Image:m_ {{{J4}}}.PNG]] [[Image:m_ {{{J5}}}.PNG]] [[Image:m_ {{{J6}}}.PNG]] [[Image:m_ {{{J7}}}.PNG]] [[Image:m_ {{{J8}}}.PNG]] [[Image:m_ {{{J9}}}.PNG]] [[Image:m_ {{{J10}}}.PNG]] [[Image:m_ {{{J11}}}.PNG]]
I [[Image:m_ {{{K1}}}.PNG]] [[Image:m_ {{{K2}}}.PNG]] [[Image:m_ {{{K3}}}.PNG]] [[Image:m_ {{{K4}}}.PNG]] [[Image:m_ {{{K5}}}.PNG]] [[Image:m_ {{{K6}}}.PNG]] [[Image:m_ {{{K7}}}.PNG]] [[Image:m_ {{{K8}}}.PNG]] [[Image:m_ {{{K9}}}.PNG]] [[Image:m_ {{{K10}}}.PNG]] [[Image:m_ {{{K11}}}.PNG]]

Champion (Level 81-83)

1 2 3 4 5 6 7 8 9 10 11
A M start M rarrow M room M rarrow M room [[Image:m_ {{{A6}}}.PNG]] [[Image:m_ {{{A7}}}.PNG]] [[Image:m_ {{{A8}}}.PNG]] [[Image:m_ {{{A9}}}.PNG]] [[Image:m_ {{{A10}}}.PNG]] [[Image:m_ {{{A11}}}.PNG]]
B [[Image:m_ {{{B1}}}.PNG]] [[Image:m_ {{{B2}}}.PNG]] [[Image:m_ {{{B3}}}.PNG]] [[Image:m_ {{{B4}}}.PNG]] M darrow [[Image:m_ {{{B6}}}.PNG]] [[Image:m_ {{{B7}}}.PNG]] [[Image:m_ {{{B8}}}.PNG]] [[Image:m_ {{{B9}}}.PNG]] [[Image:m_ {{{B10}}}.PNG]] [[Image:m_ {{{B11}}}.PNG]]
C [[Image:m_ {{{C1}}}.PNG]] [[Image:m_ {{{C2}}}.PNG]] [[Image:m_ {{{C3}}}.PNG]] [[Image:m_ {{{C4}}}.PNG]] M room M rarrow M room M rarrow M boss [[Image:m_ {{{C10}}}.PNG]] [[Image:m_ {{{C11}}}.PNG]]
D [[Image:m_ {{{D1}}}.PNG]] [[Image:m_ {{{D2}}}.PNG]] [[Image:m_ {{{D3}}}.PNG]] [[Image:m_ {{{D4}}}.PNG]] [[Image:m_ {{{D5}}}.PNG]] [[Image:m_ {{{D6}}}.PNG]] [[Image:m_ {{{D7}}}.PNG]] [[Image:m_ {{{D8}}}.PNG]] [[Image:m_ {{{D9}}}.PNG]] [[Image:m_ {{{D10}}}.PNG]] [[Image:m_ {{{D11}}}.PNG]]
E [[Image:m_ {{{E1}}}.PNG]] [[Image:m_ {{{E2}}}.PNG]] [[Image:m_ {{{E3}}}.PNG]] [[Image:m_ {{{E4}}}.PNG]] [[Image:m_ {{{E5}}}.PNG]] [[Image:m_ {{{E6}}}.PNG]] [[Image:m_ {{{E7}}}.PNG]] [[Image:m_ {{{E8}}}.PNG]] [[Image:m_ {{{E9}}}.PNG]] [[Image:m_ {{{E10}}}.PNG]] [[Image:m_ {{{E11}}}.PNG]]
F [[Image:m_ {{{F1}}}.PNG]] [[Image:m_ {{{F2}}}.PNG]] [[Image:m_ {{{F3}}}.PNG]] [[Image:m_ {{{F4}}}.PNG]] [[Image:m_ {{{F5}}}.PNG]] [[Image:m_ {{{F6}}}.PNG]] [[Image:m_ {{{F7}}}.PNG]] [[Image:m_ {{{F8}}}.PNG]] [[Image:m_ {{{F9}}}.PNG]] [[Image:m_ {{{F10}}}.PNG]] [[Image:m_ {{{F11}}}.PNG]]
G [[Image:m_ {{{G1}}}.PNG]] [[Image:m_ {{{G2}}}.PNG]] [[Image:m_ {{{G3}}}.PNG]] [[Image:m_ {{{G4}}}.PNG]] [[Image:m_ {{{G5}}}.PNG]] [[Image:m_ {{{G6}}}.PNG]] [[Image:m_ {{{G7}}}.PNG]] [[Image:m_ {{{G8}}}.PNG]] [[Image:m_ {{{G9}}}.PNG]] [[Image:m_ {{{G10}}}.PNG]] [[Image:m_ {{{G11}}}.PNG]]
H [[Image:m_ {{{H1}}}.PNG]] [[Image:m_ {{{H2}}}.PNG]] [[Image:m_ {{{H3}}}.PNG]] [[Image:m_ {{{H4}}}.PNG]] [[Image:m_ {{{H5}}}.PNG]] [[Image:m_ {{{H6}}}.PNG]] [[Image:m_ {{{H7}}}.PNG]] [[Image:m_ {{{H8}}}.PNG]] [[Image:m_ {{{H9}}}.PNG]] [[Image:m_ {{{H10}}}.PNG]] [[Image:m_ {{{H11}}}.PNG]]
I [[Image:m_ {{{I1}}}.PNG]] [[Image:m_ {{{I2}}}.PNG]] [[Image:m_ {{{I3}}}.PNG]] [[Image:m_ {{{I4}}}.PNG]] [[Image:m_ {{{I5}}}.PNG]] [[Image:m_ {{{I6}}}.PNG]] [[Image:m_ {{{I7}}}.PNG]] [[Image:m_ {{{I8}}}.PNG]] [[Image:m_ {{{I9}}}.PNG]] [[Image:m_ {{{I10}}}.PNG]] [[Image:m_ {{{I11}}}.PNG]]
I [[Image:m_ {{{J1}}}.PNG]] [[Image:m_ {{{J2}}}.PNG]] [[Image:m_ {{{J3}}}.PNG]] [[Image:m_ {{{J4}}}.PNG]] [[Image:m_ {{{J5}}}.PNG]] [[Image:m_ {{{J6}}}.PNG]] [[Image:m_ {{{J7}}}.PNG]] [[Image:m_ {{{J8}}}.PNG]] [[Image:m_ {{{J9}}}.PNG]] [[Image:m_ {{{J10}}}.PNG]] [[Image:m_ {{{J11}}}.PNG]]
I [[Image:m_ {{{K1}}}.PNG]] [[Image:m_ {{{K2}}}.PNG]] [[Image:m_ {{{K3}}}.PNG]] [[Image:m_ {{{K4}}}.PNG]] [[Image:m_ {{{K5}}}.PNG]] [[Image:m_ {{{K6}}}.PNG]] [[Image:m_ {{{K7}}}.PNG]] [[Image:m_ {{{K8}}}.PNG]] [[Image:m_ {{{K9}}}.PNG]] [[Image:m_ {{{K10}}}.PNG]] [[Image:m_ {{{K11}}}.PNG]]

Monsters

Story

After assisting Dio in closing the Dimensional Portals and recruiting the demon into their ranks, the Chase continue in their pursuit of Ashtaroth. They end up deep within a beautiful but eerie forest, and are soon ambushed by dark elven troops.

Along the way, the Chase stumbles upon a secret passageway. Ryan advises them to quickly vacate the area to avoid traps, though Amy hints at a valuable treasure hidden there.

Moving further into the forest, Special Force Leader Dahlia, like Talin Elfbane, is highly suspicious of the Chase and accuses them of teaming up with the dwarves. She engages them in an incredibly long battle, using four different attack forms, but is eventually defeated. Upon her loss, Dalia laughs and reveals that she was merely a diversion and that Baldinar had already begun to move, then teleports away. Sieghart has an ominous feeling, and the Chase quickly head for Zeruel.


Dialogue

Beginning

LirejLire: This forest is so thick. Feels like there's no end.
SieghartjSieghart: It's a beautiful forest, but at the same time, it's kind of spooky. I feel like something's about to happen.
DaliahjSpecial Force Leader Dahlia: Enemies! Archers!
SieghartjSieghart: ...Seems like bad feelings always come true.
ElesisjElesis: We're under fire!

Jumping Map

AmyjAmy: Ack!
RyanjRyan: It looks like we're in a secret passageway. We don't know if there's anything dangerous in here, so let's get out quickly.
AmyjAmy: But, I feel like there must be some great treasure hidden here.

Boss (Claw Mode)

DaliahjSpecial Force Leader Dahlia: Stop right there! I thought the opening of the portals was strange enough…
DaliahjSpecial Force Leader Dahlia: I see that these stupid dwarves are working with humans to bring the Demons into this world.
RonanjRonan: No, you've got it all wrong. We've also come here to find out what's going on.
DaliahjSpecial Force Leader Dahlia: I will not fall for your lies. Attack the humans!
ElesisjElesis: Haaaaa…why won't she believe us?

Boss (Dagger Mode)

DaliahjSpecial Force Leader Dahlia: Impressive. However, you won't stop our daggers!

Boss (Bow Mode)

DaliahjSpecial Force Leader Dahlia: You won't escape our arrows!

Boss (Cavalier Mode)

DaliahjSpecial Force Leader Dahlia: Ha ap~! You won't evade my spear!

Post Boss Battle

DaliahjSpecial Force Leader Dahlia: Keuk!
LirejLire: Please, stop. All this fighting is just meaningless!
DaliahjSpecial Force Leader Dahlia: Hahahaha! Impressive, Grand Chase. But, it's already too late. Bardinar is already on the move.
SieghartjSieghart: Bardinar! How do you know him?
DaliahjSpecial Force Leader Dahlia: I'll never tell. In any case, I've wasted enough of your time, and I have other matters to take care of.
SieghartjSieghart: Wait!
(Dahlia teleports away)
SieghartjSieghart: Zeruel…I have a bad feeling about this.
LirejLire: Let's hurry!

Trivia

  • Zeruel Border is the second dungeon, the first being Moonlight Village, to introduce an entry hazard. Purple arrows will rain down on the player during the cutscene and deal damage, though this can be avoided if the cutscene is skipped and players jump out of the way in time.
  • On Very Hard difficulty and above, all Zeruel Border monsters gain additional properties to their attacks that inflict the Bleed and Poison ailments and will incur a huge amount of damage over time if the player is afflicted.
Dungeons of Grand Chase
Serdin
Trial Forest | Trial Tower | Outer Wall of Serdin | Kerrie Beach | Orc Temple | Gorgos' Dungeon
Kanavan
Elven Forest | Gorge of Oath | Marsh of Oblivion | Forsaken Barrows | Forgotten City | Gaikoz's Castle
Silver Land
The Whispering Woods | Ruins of the Silver Knights | Lake Aurora | King Guang's Fen | Primeval Island | King Fang's Lair | Victor's Fortress
Ellia
Partusay's Sea | Kamiki Castle | Temple of Fire | Hell Bridge | Kaze'aze's Castle | Kastulle Ruins Lower Floor | Kastulle Ruins Upper Floor | Battle for Bermesiah | Dimension's Door
Xenia
Xenia Border | Temple of Cuatal | Valstrath | The Wyrm's Maw | Altar of Judgement | Temple of Destruction | Forest of Life | Fortress of Ascension | Dimension's Door
Alcubra
Goblin Work Site | Underpass of Lost Hope | Kungji Village | Sands of Illusion | Deserted Town | Ra Canyon | Seth's Pyramid | Dimension's Door
Archimedia
Hammer's Reach | Under Hammer | Thunder Hammer | Relics of Kounat | Zeruel Border | Zeruel | Kounat's Collapse | Dimension's Door
île de Frost
Cursed Garden | Contaminated Basement | Spectral Corridor | Traitor's Art Room | Dark Library | Arachne's Nest
Trivia
Goliath Habitat | Ancient Golem Ruins | Shadow Forest | Lacerta Hunting Ground | Land of Despair | Dimension's End
Hero Dungeons
Sanctum of Destruction | The Crucible | Wizard's Labyrinth | Tower of Disappearance | Land of Judgment
Event Dungeons
Relay Dungeon | Nightmare Circus | Monster Train 301 | Hungry Pets' Revolt | Moonlight Village | Kounat Mental Collapse | Talin's Revenge | King Slime Land | Gorgos Queen's Nest | Illusions of Memory | Throne of the Goddess | Dimensional Chaser
Raid Dungeons
Berkas' Lair | Void (Invasion) | Void (Taint)